
Door closers are essential components ensuring smooth, controlled door operation, enhancing safety, convenience, and energy efficiency by maintaining climate control․ Proper installation guarantees reliability and longevity, making them vital for commercial and residential spaces․ This guide walks you through the process, whether installing new or replacing existing systems․
1․1 Overview of Door Closers and Their Importance
Door closers are mechanisms designed to automatically close doors, ensuring smooth and controlled operation․ They are essential for maintaining security, energy efficiency, and accessibility in both residential and commercial settings․ Available in various types, such as hydraulic, spring-loaded, and concealed models, door closers provide consistent performance․ Their importance lies in preventing fire spread, reducing noise, and enhancing accessibility compliance․ Proper installation ensures doors function seamlessly, offering reliability and longevity․ By automating door closure, they minimize manual effort, making them a critical component in modern construction and facility management․ Their benefits extend to energy conservation and safety, making them indispensable in everyday use․
1․2 Brief History and Evolution of Door Closers
The concept of door closers dates back to the late 19th century, initially designed as simple mechanical devices to automate door closure․ Over time, advancements led to hydraulic and spring-loaded systems, improving reliability and functionality․ The 20th century saw the introduction of adjustable door closers, enabling customization for different door weights and sizes․ Modern door closers now feature advanced technologies, such as delayed closing and soft-stop mechanisms, enhancing user experience․ The evolution reflects a focus on safety, efficiency, and accessibility, making door closers indispensable in both residential and commercial environments․ Their development continues to adapt to contemporary architectural and functional demands․
1․3 Key Benefits of Proper Door Closer Installation
Proper door closer installation ensures smooth, consistent operation, enhancing both functionality and longevity․ It improves energy efficiency by maintaining climate control and reduces wear on the door and frame․ Correctly fitted closers also boost safety by preventing accidents caused by slamming doors․ Additionally, they minimize noise and vibration, creating a quieter environment․ Proper installation aligns with accessibility standards, ensuring ease of use for all individuals․ It also extends the lifespan of the door closer by preventing overuse or misalignment․ Overall, a well-installed door closer provides reliability, convenience, and long-term cost savings, making it a crucial investment for any property․

Tools and Materials Needed for Installation
Essential tools include screwdrivers, drills, and wrenches, while materials like screws, brackets, and adjustment valves are necessary․ Optional accessories such as door stops and alignment templates aid installation․
2․1 Essential Tools: Screwdrivers, Drills, and Wrenches
The installation of a door closer requires specific tools to ensure accuracy and efficiency․ Screwdrivers, both flathead and Phillips, are necessary for securing screws and adjusting components․ A drill is essential for creating pilot holes in the door frame or leaf, preventing damage during screw placement․ Wrenches, particularly adjustable ones, are used to tighten bolts and secure the main arm to the door closer body․ These tools are fundamental for a proper and professional installation, ensuring the door closer functions smoothly and reliably over time․
2․2 Required Materials: Screws, Brackets, and Adjustment Valves
The successful installation of a door closer depends on having the right materials․ Screws are essential for securing the door closer body to the frame and attaching the main arm to the door․ Brackets, such as mounting brackets, provide a stable base for the closer, ensuring proper alignment․ Adjustment valves are critical for fine-tuning the door’s closing speed and latching force, allowing for customization to meet specific needs․ These materials are typically included in the door closer kit but should be verified before starting the installation process to avoid delays․
2․3 Optional Accessories: Door Stops and Alignment Templates
Optional accessories like door stops and alignment templates enhance the installation process and functionality of door closers․ Door stops prevent the door from swinging too far, reducing wear and tear on the closer and surrounding structure․ Alignment templates ensure precise positioning of the door closer components, making the installation more accurate and efficient․ While not mandatory, these accessories contribute to a smoother operation and longer lifespan of the door closer system, offering additional convenience and reliability for both residential and commercial applications․

Preparation Before Fitting the Door Closer
Assess the door and frame for compatibility, ensuring the door swings freely․ Check the door’s weight and size to select the appropriate closer․ Secure the door and clear the area for safe installation․
3․1 Assessing the Door and Frame for Compatibility
Before installation, ensure the door closer aligns with the door type and weight․ Check the door’s material, size, and swing direction․ Verify the frame’s condition and measurements to accommodate the closer’s mounting points․ Ensure the door closes freely without obstructions․ Compatibility is crucial for optimal performance and longevity of the closer․ Proper alignment prevents misinstallation and ensures smooth operation․ Always refer to manufacturer guidelines for specific door and frame requirements to achieve a secure and functional fit․ This step ensures the closer operates efficiently and maintains the door’s intended use and safety standards․
3;2 Checking Door Weight and Size for Proper Closer Selection
Accurately measure the door’s weight and dimensions to select the right closer․ Most closers are rated for specific weight ranges, typically between 65kg to 85kg․ Ensure the door’s size matches the closer’s capacity, as oversized or undersized closers may malfunction․ Consider the door type—wooden, metal, or glass—and its intended use․ Refer to manufacturer guidelines for weight and size specifications․ Proper selection ensures smooth operation, prevents wear, and extends the closer’s lifespan․ Always verify compatibility before installation to guarantee optimal performance and safety․ This step is crucial for a reliable and long-lasting door closer system․
3․3 Ensuring Safety: Clearing the Area and Securing the Door
Before starting installation, clear the surrounding area to prevent accidents․ Remove any obstructions that could interfere with the door’s movement․ Secure the door in a stationary position using door stops or clamps to avoid unexpected swings․ Ensure the floor is clear of tools and materials to minimize tripping hazards․ Wear safety gloves and eyewear for protection․ If working at heights, use appropriate ladder safety measures․ Properly securing the door ensures stability during fitting, reducing the risk of injury or damage․ A safe environment allows for a focused and efficient installation process․ Always prioritize safety to avoid potential risks․

Step-by-Step Installation Instructions
Mount the door closer body on the frame, align the main arm with the door, secure tightly, and adjust for proper alignment․ Ensure smooth operation through precise alignment and adjustment․
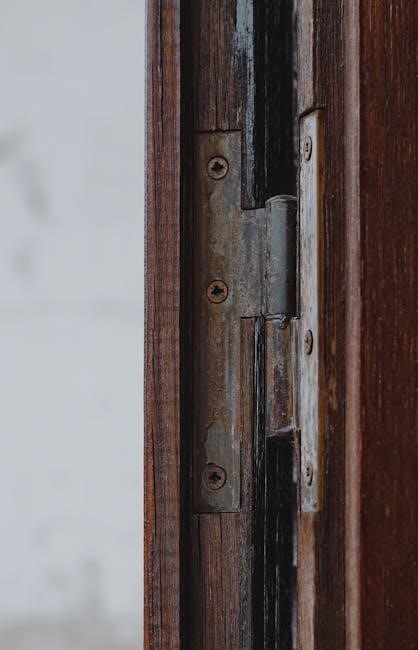
4․1 Mounting the Door Closer Body on the Frame
Position the door closer body on the frame, ensuring alignment with the door’s hinge side․ Use the provided screws to secure it firmly․ The adjustment valves should face the hinge edge for easy access․ Double-check the alignment to ensure proper functionality․ Once mounted, test the door’s movement to confirm smooth operation and correct positioning․ Properly securing the closer body is crucial for the overall performance of the door closer system․
4․2 Attaching the Main Arm to the Door
Attach the main arm to the door using the provided screws, ensuring it is perpendicular to the door’s surface․ Align the arm with the closer’s pinion shaft for proper engagement․ Tighten the arm screw securely to prevent loosening over time․ Ensure the arm is positioned to allow full door movement without obstruction․ Proper alignment and secure fastening are critical for smooth operation and durability of the door closer system․ Double-check the arm’s placement to avoid misalignment issues during door operation․
4․3 Installing the Control Arm and Adjusting Alignment
Install the control arm by attaching it to the door closer body and aligning it with the main arm․ Secure it using the provided screws, ensuring it is tightly fastened․ Adjust the alignment to ensure the door closes smoothly and evenly․ Check the door’s movement, making sure it latches properly without resistance․ Fine-tune the control arm’s position to achieve optimal alignment, ensuring the door operates seamlessly․ Proper alignment prevents wear on the closer and ensures consistent performance over time․ Double-check the door’s operation after adjustments to confirm smooth closing and latching functionality․
4․4 Securing the Door Closer to the Door Leaf
Secure the door closer to the door leaf by aligning the closer body with the pre-drilled holes on the door․ Use the provided screws to fasten it tightly, ensuring the door closer is flush with the door surface․ Avoid overtightening, as this may damage the door or closer․ Double-check the alignment using a spirit level to ensure proper positioning․ Once secured, test the door’s operation to confirm smooth closing and latching․ Properly securing the closer ensures consistent performance and prevents wear on the door and closer mechanism over time․ Make sure all screws are tightened evenly for a stable installation․
Adjusting the Door Closer for Optimal Performance
Adjust the spring power, latching speed, and closing speed to ensure smooth operation․ Proper alignment and fine-tuning guarantee the door closes securely and efficiently every time․

5․1 Adjusting the Spring Power for Door Weight
Adjusting the spring power ensures the door closer matches the door’s weight, providing smooth operation․ Begin by testing the door’s movement post-installation․ If it closes too slowly, increase spring tension using the adjustment valve or nut․ Conversely, reduce tension if the door slams shut․ Over-tightening can cause rapid closing, while under-tightening may result in slow or incomplete closure․ Fine-tune the spring power until the door closes firmly but gently, ensuring proper latching․ This step is critical for optimal performance, safety, and longevity of the door closer․ Always refer to the manufacturer’s guidelines for specific adjustment instructions․
5․2 Fine-Tuning the Latching Speed
Fine-tuning the latching speed ensures the door closes securely without slamming․ Locate the latching speed adjustment valve, typically marked with an “L” or similar label․ Turn the valve clockwise to increase the latching speed or counterclockwise to decrease it․ Test the door by opening it slightly and releasing it to observe how quickly it latches․ Adjust the valve in small increments until the door closes smoothly and latches firmly․ Avoid over-tightening, as this may cause the door to slam shut․ Proper latching speed ensures safety, prevents damage, and maintains optimal door performance․ Always test the door after adjustments to confirm satisfactory operation․
5․3 Setting the Closing Speed for Smooth Operation
To achieve smooth door operation, adjust the closing speed by locating the adjustment valve, often labeled with an “S” or similar marking․ Turn the valve clockwise to slow the closing speed or counterclockwise to increase it․ Open the door fully and observe how it closes․ The ideal setting allows the door to shut firmly but gently, avoiding slamming․ Test the door multiple times to ensure consistent performance․ Proper closing speed ensures user safety, prevents wear on the door and frame, and maintains a professional appearance․ Adjustments may be needed over time due to temperature changes or door weight shifts․ Always test the door thoroughly after making changes․
5․4 Aligning the Door for Proper Closure
Proper door alignment is crucial for smooth operation and effective closing․ Start by ensuring the latch bolt aligns with the strike plate on the door frame․ If misaligned, the door may not close securely․ Inspect the door frame and hinges for any signs of warping or unevenness․ To adjust, loosen the hinge screws slightly, gently shift the door into the correct position, and retighten the screws․ Use shims if necessary to maintain proper alignment․ After adjustments, test the door by opening and closing it repeatedly to confirm it latches smoothly․ Proper alignment prevents wear on the door and closer, ensuring long-term functionality and reliability․

Specialized Installation Scenarios
Specialized techniques are required for concealed, parallel arm, and heavy-duty door closers, each demanding unique tools and adjustments to ensure proper alignment and functionality․
6․1 Fitting Concealed Door Closers
Fitting concealed door closers requires precise alignment and careful preparation․ These closers are installed internally, making them invisible from the outside, ideal for aesthetic designs․ Start by marking the frame and door for pre-drilled holes, ensuring proper alignment with the door’s hinge side․ Mount the closer body securely, then attach the arm to the door edge․ Adjust the control arm to align with the closer’s spindle, ensuring smooth operation․ Use adjustment valves to fine-tune spring power and closing speed․ Double-check door balance and alignment to prevent uneven closure․ Concealed closers demand accuracy but offer a sleek, modern solution for controlled door movement․
6․2 Installing Parallel Arm Door Closers
Parallel arm door closers are ideal for heavy-duty applications and offer durability․ Begin by mounting the closer body on the door frame, ensuring it aligns with the hinge side․ Attach the parallel arm to the door leaf, positioning it parallel to the frame․ Secure the arm using provided screws, ensuring it’s perpendicular to the door’s edge․ Adjust the arm’s length to achieve proper alignment with the closer’s spindle․ Fine-tune the spring power and closing speed using adjustment valves․ Test the door’s operation, ensuring smooth closure without resistance․ Parallel arm closers are robust and suitable for high-traffic areas, requiring precise installation for optimal performance and longevity․
6․3 Handling Heavy-Duty or Industrial Door Closers
Heavy-duty or industrial door closers are designed for large, heavy doors in high-traffic commercial settings․ They require robust hardware and precise installation to ensure smooth operation․ Begin by assessing the door’s weight and frame strength to select the appropriate closer․ Mount the closer body securely, using high-strength screws and brackets․ Attach the main arm to the door, ensuring alignment with the hinge side․ Adjust the spring power and closing speed to accommodate the door’s weight․ Regular lubrication of moving parts is essential for longevity․ These closers are built to withstand heavy use and provide reliable performance in demanding environments․

Common Issues and Troubleshooting
Common issues include door misalignment, slow or fast closing, and noise․ Adjust spring tension, check arm alignment, and lubricate moving parts to resolve these problems effectively;

7․1 Dealing with Door Misalignment
Door misalignment is a common issue that affects proper closing․ Check if the door closer body and main arm are correctly aligned with the door and frame․ Loosen the mounting screws slightly and adjust the closer body to ensure the main arm connects smoothly with the door․ Tighten the screws firmly after alignment․ If the door still doesn’t close properly, inspect the strike plate and latch bolt for correct engagement․ Adjusting the door closer’s spring tension or replacing worn components may also resolve misalignment issues, ensuring smooth and consistent door operation․
7․2 Resolving Slow or Fast Closing Issues
Adjust the closing speed using the adjustment valves on the door closer․ For slow closing, turn the valve clockwise to increase spring tension․ For fast closing, turn it counterclockwise to reduce tension․ Ensure the door closer is properly lubricated, as dry parts can cause slow operation․ If issues persist, check for air leaks in hydraulic closers or worn seals․ Fine-tune the latching speed separately to ensure smooth engagement with the strike plate․ Test the door after each adjustment to achieve the desired closing speed․ If problems remain, consult a professional or refer to the manufacturer’s troubleshooting guide for further assistance․
7․3 Addressing Noise or Vibration Problems
Noise or vibration issues in door closers often stem from loose screws, insufficient lubrication, or misalignment․ Tighten all mounting screws and ensure proper alignment between the closer and door․ Apply silicone-based lubricant to moving parts to reduce friction and quiet operation․ If vibrations persist, check for worn components like arm brackets or bushings, which may need replacement․ Adjust the spring power to match the door’s weight, as imbalance can cause noise․ Regularly inspect and maintain the closer to prevent such issues․ If problems continue, consult a professional or refer to the manufacturer’s guidelines for troubleshooting specific models․

Maintenance and Upkeep of Door Closers
Regular lubrication of moving parts ensures smooth operation․ Inspect components for wear and replace them promptly․ Schedule professional maintenance annually for optimal performance and longevity․
8․1 Regular Lubrication of Moving Parts
Regular lubrication of moving parts is crucial for maintaining smooth door closer operation․ Apply silicone-based lubricant to hinges, pivot points, and arm joints․ This reduces friction, preventing wear and tear․ Ensure the lubricant is suitable for the material to avoid damage․ Over-lubrication can attract dust, so use it sparingly․ Lubricate every 6-12 months or when squeaking occurs․ This simple maintenance step extends the lifespan of the door closer and ensures consistent performance over time․ Always refer to the manufacturer’s guidelines for specific lubrication recommendations․
8․2 Inspecting and Replacing Worn Components
Regularly inspecting door closer components ensures optimal performance and longevity․ Check the main arm, springs, and hinges for signs of wear or damage․ If any part shows excessive wear, replace it immediately to prevent malfunction․ Inspect every 6-12 months, or sooner if the door closer shows signs of sluggish operation or noise․ Use original manufacturer parts for replacements to maintain reliability․ Addressing worn components promptly avoids costly repairs and ensures smooth, consistent door operation․ If unsure about inspections or replacements, consult a professional for assistance․
8․3 Scheduling Professional Maintenance
Scheduling regular professional maintenance ensures door closers operate efficiently and last longer․ Arrange for inspections by certified technicians annually or bi-annually, depending on usage․ They will assess spring tension, arm alignment, and component wear․ During maintenance, lubricate moving parts and replace worn components promptly․ Professional services guarantee compliance with safety standards and manufacturer recommendations․ This proactive approach prevents unexpected failures and reduces repair costs․ Maintain a schedule to ensure your door closers function reliably, providing smooth operation and security for years to come․