Unreasonable Hospitality: A Comprehensive Guide & PDF Access (Updated 03/26/2026)
Today, March 26th, 2026, we delve into the fascinating world of “unreasonable hospitality,” sparked by the legendary Van Halen’s detailed rider demands from the 1980s․
This guide explores the origins, evolution, and modern implications of these requests, offering insights and legitimate resources for accessing related information, including a potential PDF․
We’ll unpack the concept, moving beyond the myth of the M&Ms clause to understand the practicalities and legalities surrounding band riders across various industries․
What is “Unreasonable Hospitality”? Defining the Concept
The term “unreasonable hospitality,” while seemingly paradoxical, doesn’t necessarily imply excessive demands․ Instead, it represents a meticulous attention to detail and a proactive approach to anticipating and fulfilling the specific needs of guests – in this case, often performers․
Initially popularized through anecdotes surrounding Van Halen’s famously detailed concert riders, the concept has evolved․ It’s less about outlandish requests and more about ensuring a consistent and comfortable experience for artists, allowing them to deliver their best performance․ The core idea centers on removing potential distractions and logistical hurdles․
This proactive hospitality extends beyond basic necessities․ It encompasses technical specifications, dietary requirements, security protocols, and even seemingly minor preferences․ While some requests might appear unreasonable at first glance, they often serve a practical purpose – ensuring equipment safety, artist well-being, or maintaining a specific performance standard․
The term has gained traction as a business philosophy, emphasizing the power of exceeding expectations and creating a memorable experience․ Understanding this nuanced definition is crucial before diving into the specifics of band riders and their associated documentation, like the sought-after “Unreasonable Hospitality” PDF․
The Van Halen Rider: The Origin Story
The story of Van Halen’s rider, circulating since the 1980s, is arguably the genesis of the “unreasonable hospitality” narrative․ It wasn’t simply a list of demands; it was a carefully crafted document designed to test a venue’s attention to detail and, crucially, ensure the band’s safety and technical requirements were met․
The infamous M&Ms clause – requesting only brown M&Ms be removed from the candy bowls – often overshadows the rider’s true purpose․ This wasn’t about a sweet tooth; it was a quick visual check․ If the venue meticulously removed the brown M&Ms, it indicated they’d thoroughly read and adhered to the entire rider, including critical safety instructions․
Beyond the M&Ms, the rider detailed precise specifications for stage setup, sound systems, lighting, and even back-stage amenities․ These weren’t arbitrary requests; they were essential for Van Halen’s elaborate and often pyrotechnic-heavy performances․ The rider aimed to prevent accidents and guarantee a consistent show quality․
This origin story, frequently discussed in resources like the “Unreasonable Hospitality” PDF, highlights how riders evolved from basic needs lists to comprehensive operational manuals, shaping the expectations for artist hospitality today․
The Significance of the M&Ms Clause: Beyond the Myth
The M&Ms clause in Van Halen’s rider has become synonymous with “diva” behavior, yet its true significance is profoundly misunderstood․ While often portrayed as an absurd demand, it served as a crucial litmus test for venue diligence and a safeguard for the band’s safety․
David Lee Roth, Van Halen’s frontman, explicitly stated the clause wasn’t about the candy itself․ It was a quick and easy way to determine if the venue staff had thoroughly read and understood the entire rider, which contained vital technical and safety specifications․ Removing the brown M&Ms demonstrated attention to detail․
The rider detailed complex stage configurations, electrical requirements, and safety protocols related to pyrotechnics․ A failure to adhere to these specifications could have resulted in equipment malfunctions or, more seriously, injuries․ The M&Ms clause was a simple check for comprehensive compliance․
Resources exploring “unreasonable hospitality,” including available PDFs, often debunk this myth, emphasizing the practical reasoning behind the request․ It wasn’t about indulgence; it was about ensuring a safe and professionally executed performance․
Why Bands Have Riders: A Detailed Explanation
Band riders aren’t simply wish lists; they are legally binding contracts outlining the specific requirements a venue must meet to host a performance․ These documents evolved from basic needs – food, lodging, and sound equipment – into comprehensive specifications covering nearly every aspect of a show․
Historically, riders protected artists from inconsistent conditions across different venues․ Early touring lacked standardization, meaning bands faced unpredictable equipment, inadequate accommodations, or even unsafe performance spaces․ Riders ensured a baseline level of professionalism and safety․
Today, riders detail everything from precise sound and lighting configurations to backstage catering, security personnel, and even the type of towels provided․ They safeguard the artist’s performance quality and protect them from liability․
Exploring resources on “unreasonable hospitality,” including potential PDF guides, reveals that riders are crucial for logistical planning and legal protection․ They define expectations, minimize disputes, and ensure a smooth and successful event for all parties involved․ They are essential for touring acts․
The Evolution of Band Riders: From Basic Needs to Complex Requests
The earliest band riders, emerging in the mid-20th century, were remarkably simple․ They primarily focused on fundamental necessities: guaranteeing a functional stage, basic backline equipment (drums, amplifiers), and modest hospitality – often just meals and lodging for the band members․
As touring became more sophisticated, riders grew in complexity․ The rise of arena rock in the 1970s and 80s, exemplified by bands like Van Halen, marked a turning point․ Detailed technical specifications became commonplace, demanding specific sound systems and lighting rigs․
The infamous Van Halen rider, often cited in discussions of “unreasonable hospitality” and explored in related PDF resources, showcased this evolution․ It included seemingly quirky requests alongside crucial technical demands, testing venue attentiveness․
Today, riders continue to evolve, reflecting artists’ increasingly specific needs and concerns․ They now encompass everything from internet access and dressing room amenities to security protocols and even environmental considerations․ This reflects a growing professionalization of the live music industry․
Modern Band Riders: What Do Artists Request Today?
Contemporary band riders demonstrate a significant shift beyond basic needs․ While technical specifications remain paramount – precise sound and lighting configurations, stage dimensions, and power requirements – modern requests are far more nuanced․
Artists frequently specify dietary requirements, ranging from vegan and gluten-free options to detailed lists of approved brands․ Backstage amenities now routinely include comfortable furniture, high-speed internet access, and dedicated restrooms․
Security provisions are increasingly detailed, outlining protocols for stage access, crowd control, and artist protection․ Many riders also address environmental concerns, requesting eco-friendly practices and waste reduction initiatives․
Furthermore, riders often include stipulations regarding guest lists, merchandise sales, and promotional activities․ The level of detail reflects the artist’s brand and the complexity of their touring operation․ Resources, like those found in a comprehensive “unreasonable hospitality” PDF, detail these evolving expectations․
Ultimately, modern riders aim to create a comfortable and professional environment, ensuring the artist can deliver their best performance․
Beyond Music: Hospitality Riders in Other Industries (Film, Sports)

The concept of hospitality riders extends far beyond the music industry, becoming standard practice in film production and professional sports․ Film crews utilize riders to secure necessary equipment, catering, and accommodation for cast and staff during location shoots․
These riders often detail specific dietary needs, transportation arrangements, and on-set amenities, mirroring the complexity of band riders․ Similarly, professional athletes and sports teams employ riders to ensure optimal conditions for performance․
Requests can include specialized training equipment, specific meal plans, preferred hotel suites, and detailed transportation logistics․ The goal is to minimize distractions and maximize athlete well-being․
Like music riders, these documents are legally binding contracts, outlining the obligations of the hosting entity․ A comprehensive guide, potentially available as an “unreasonable hospitality” PDF, would illuminate the commonalities and differences across these sectors․
Essentially, any industry requiring logistical support for high-profile individuals or teams utilizes riders to guarantee a smooth and successful operation․
Legal Aspects of Hospitality Riders: Contracts and Liabilities
Hospitality riders are legally binding contracts, meticulously outlining the obligations of venues and hosts towards performers or teams․ Failure to fulfill the stipulations within a rider can result in significant legal repercussions, including breach of contract lawsuits and financial penalties․
Venues must carefully review riders before agreeing to them, understanding the scope of their commitments․ Ambiguous clauses can lead to disputes, emphasizing the importance of clear and precise language․ Liability concerns are paramount; venues are responsible for ensuring the safety and well-being of those covered by the rider․
Insurance coverage is crucial, protecting against potential claims arising from rider-related incidents․ A detailed “unreasonable hospitality” PDF could offer legal templates and best practices for rider negotiation and compliance․
Furthermore, riders often include clauses addressing force majeure – unforeseen circumstances that may prevent fulfillment․ Understanding these clauses is vital for mitigating risk․ Proper documentation and adherence to contractual obligations are essential for avoiding legal complications․
Ultimately, a rider is a serious legal document demanding careful attention and professional guidance․
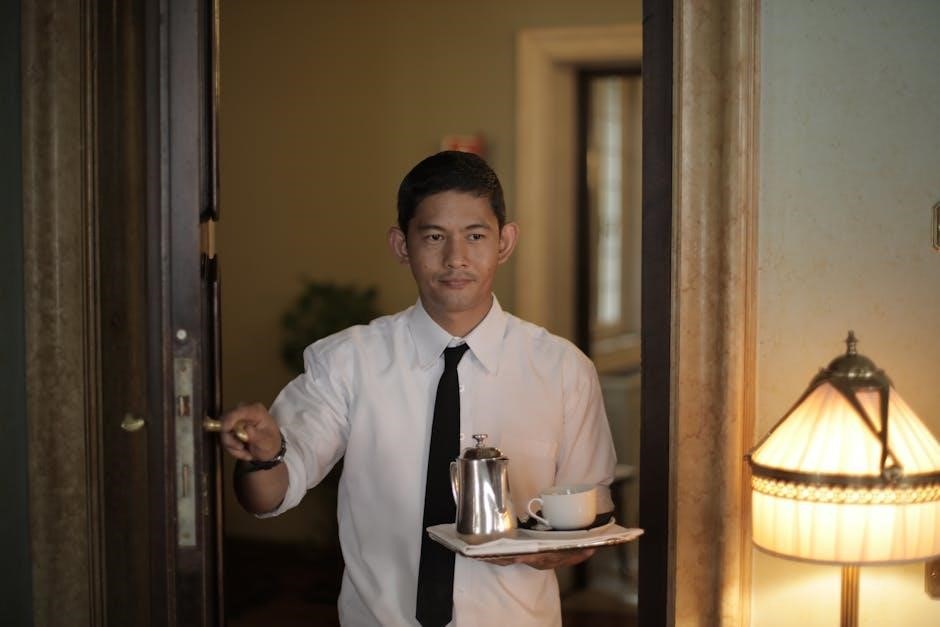
The Role of Tour Managers in Rider Fulfillment
Tour managers are the linchpin in ensuring hospitality riders are meticulously fulfilled, acting as the primary liaison between the artist and the venue․ Their responsibilities extend far beyond simply presenting the rider; they proactively manage logistics, anticipate potential issues, and troubleshoot problems in real-time․
A skilled tour manager will thoroughly review the rider, clarifying any ambiguities with the venue well in advance of the event․ They oversee the procurement of requested items – from specific beverages to technical equipment – and confirm their availability upon arrival․
Effective communication is key; tour managers maintain constant contact with venue staff, addressing concerns and ensuring adherence to the rider’s specifications․ A comprehensive “unreasonable hospitality” PDF could detail best practices for tour manager-venue collaboration․
They also document any discrepancies or failures to meet rider requirements, potentially crucial for legal recourse․ Their expertise minimizes disruptions and ensures the artist’s needs are met, contributing to a smooth and successful tour․
Essentially, the tour manager transforms the rider from a list of demands into a seamlessly executed reality․
Common Rider Requests: Food & Beverage
Food and beverage requests within hospitality riders are remarkably diverse, ranging from basic necessities to highly specific preferences․ While a simple request for bottled water and fruit is common, many artists detail elaborate catering requirements, specifying cuisines, dietary restrictions (vegan, gluten-free, allergies), and even preferred brands․
Backstage hospitality often includes a fully stocked refrigerator with specific beverages – sparkling water, juices, teas, and sometimes alcoholic drinks (with strict guidelines)․ A detailed “unreasonable hospitality” PDF might showcase examples of these requests․
Snacks are also prevalent, ranging from healthy options like nuts and granola bars to indulgent treats․ Some riders demand specific types of cookies or candies, echoing the Van Halen M&Ms anecdote, though usually for legitimate quality control reasons․
Hot meals are frequently requested, often with a pre-set menu or the option for the artist to order from a local restaurant․ The quality and presentation of food are paramount, reflecting the artist’s overall experience․
Ultimately, these requests aim to provide comfort and sustenance while on tour․
Common Rider Requests: Technical Specifications (Sound, Lighting)
Technical riders are arguably the most crucial component, detailing precise requirements for sound, lighting, and stage setup․ These specifications ensure the artist can deliver their performance as intended, and a comprehensive “unreasonable hospitality” PDF would likely dedicate significant space to this section․
Sound riders specify console models, speaker systems, microphone types, and monitor configurations․ Artists often request specific brands and models known for their quality and reliability․ Detailed stage plots illustrate equipment placement and cabling routes․
Lighting riders outline desired lighting fixtures, color palettes, and programming cues․ Complex shows may require specific lighting operators and pre-programmed light shows․ Power requirements are meticulously detailed to prevent electrical issues․
Beyond audio and visuals, riders may include requests for risers, drum kits, backline equipment (amplifiers, keyboards), and even specific instrument tunings․ These details are vital for a smooth and professional show․
Meeting these technical demands is paramount for venues aiming to host successful events․
Common Rider Requests: Accommodation & Transportation
Accommodation and transportation requests form a substantial part of most hospitality riders, ensuring artists and their crew travel and rest comfortably․ A detailed “unreasonable hospitality” PDF would outline the typical standards expected in these areas․
Hotel requirements often specify star ratings, room types (suites are common for headliners), and amenities like high-speed internet and gym access․ Proximity to the venue is also a key consideration․ Multiple rooms are needed for band members, crew, and management․
Transportation requests range from airport pickups and drop-offs to daily transport to and from the venue․ Artists may request luxury vehicles or dedicated drivers․ Detailed itineraries are provided to ensure smooth logistics․
Tour buses are frequently specified for longer tours, offering a mobile base of operations․ These buses must meet certain safety and comfort standards․ Flight arrangements, including class of service, are also common requests․
Venues must meticulously fulfill these requests to maintain positive artist relations․
Common Rider Requests: Security & Personnel
Security and personnel requirements are paramount in hospitality riders, reflecting the need to protect artists, their equipment, and fans․ A comprehensive “unreasonable hospitality” PDF would detail the typical stipulations in this critical area․
Requests often include a specified number of security personnel, both uniformed and plainclothes, to manage crowds and prevent unauthorized access․ Backstage security is particularly emphasized, controlling access to artist areas․
Local law enforcement coordination is frequently requested, ensuring a visible security presence․ Specific protocols for handling emergencies and potential threats are outlined․ Detailed security plans are often required in advance․
Beyond security, riders may specify personnel like dedicated runners to fulfill requests, stagehands for setup and teardown, and hospitality staff to manage catering and artist needs․ Qualified medical personnel are also often required on-site․
Venues must prioritize these requests to ensure a safe and secure environment for all involved․
The Impact of Riders on Venue Costs
Hospitality riders significantly impact venue costs, extending far beyond the initial performance fee․ A detailed “unreasonable hospitality” PDF would likely analyze these financial implications for event organizers․
The cost of fulfilling food and beverage requests, ranging from specific brands to elaborate catering, can be substantial․ Technical rider demands, including sound and lighting equipment, often necessitate rentals or upgrades․
Security personnel, as outlined in the rider, represent a significant expense, particularly for larger events requiring extensive coverage․ Accommodation and transportation costs for the artist and their crew add to the overall budget․
Unexpected requests or last-minute changes can lead to additional, unplanned expenses․ Venues must carefully assess rider demands during contract negotiations to accurately project costs․
Ultimately, rider fulfillment is a balancing act between artist expectations and the venue’s financial constraints, impacting ticket prices and event profitability․
Negotiating Riders: A Venue’s Perspective
From a venue’s standpoint, negotiating riders is a critical process balancing artist satisfaction with budgetary realities․ A comprehensive “unreasonable hospitality” PDF could offer valuable insights into effective negotiation strategies․
Venues often prioritize essential requests – safety, technical feasibility – while identifying areas for potential compromise․ Excessive or unusual demands are typically challenged, seeking reasonable alternatives․
Establishing clear communication with the artist’s tour manager is paramount, fostering a collaborative approach to rider fulfillment․ Transparency regarding available resources and limitations is crucial․
Venues may offer tiered options, providing a base level of hospitality with opportunities for upgrades at an additional cost․ Pre-approved vendor lists can streamline procurement and control expenses․
Ultimately, successful rider negotiation requires a firm understanding of industry standards, a willingness to compromise, and a focus on building a positive working relationship with the artist’s team․
Understanding Rider “Stars”: Prioritizing Requests
Hospitality riders frequently employ a system of “stars” or tiered prioritization, indicating the importance of each request to the artist․ A detailed “unreasonable hospitality” PDF might decode these systems further․
“Star” requests – often marked with asterisks or specific notations – denote non-negotiable items essential for the artist’s performance or well-being․ These demands receive immediate attention․
Requests without stars represent preferences or “wish list” items, offering venues greater flexibility for negotiation or substitution․ These are often areas where compromise is possible․
Understanding this hierarchy allows venues to allocate resources effectively, ensuring critical needs are met while managing costs associated with less essential requests․
Experienced tour managers often clarify the significance of each star level during initial negotiations, preventing misunderstandings and streamlining the fulfillment process․ Prioritization is key to a smooth show․

Finding & Accessing the “Unreasonable Hospitality” PDF (Legitimate Sources)

Locating a comprehensive “Unreasonable Hospitality” PDF requires caution, as many online sources are unreliable or contain outdated information․ Prioritize legitimate industry resources for accurate content․
Official publications from performance rights organizations (PROs) like ASCAP or BMI may offer insights into rider practices, potentially including downloadable guides or reports․ Check their websites․
Industry trade associations, such as the International Live Music Conference (ILMC), sometimes release white papers or educational materials covering hospitality rider details․
Reputable event planning and venue management blogs or websites may host articles summarizing key rider considerations, occasionally offering downloadable checklists or templates․
University libraries with strong music business programs could provide access to scholarly articles or research papers analyzing rider trends․ Always verify source credibility before downloading any PDF․
Be wary of unofficial websites promising “free” PDFs, as these often harbor malware or copyright violations․
Risks of Downloading PDFs from Unofficial Sources (Malware, Copyright)

Downloading PDFs related to “Unreasonable Hospitality” from unverified websites carries significant risks․ The internet is rife with malicious actors distributing malware disguised as legitimate documents․
These PDFs can contain viruses, trojans, or ransomware that compromise your device and data security․ Always ensure your antivirus software is up-to-date before opening any downloaded file․
Beyond malware, copyright infringement is a major concern․ Unauthorized distribution of copyrighted materials, including detailed guides on band riders, is illegal․
Downloading from unofficial sources supports piracy and potentially exposes you to legal repercussions․ Respect intellectual property rights and seek legitimate sources․
Furthermore, inaccurate or outdated information in these PDFs can lead to costly mistakes when negotiating or fulfilling rider requests․ Rely on trusted industry resources․
Prioritize safety and legality by avoiding “free” downloads from unknown websites and opting for official publications or reputable industry sources instead․
Alternatives to PDF Downloads: Online Resources & Articles
Instead of seeking a potentially risky “Unreasonable Hospitality” PDF download, numerous reliable online resources offer comprehensive information․ Industry-specific websites dedicated to event planning, tour management, and venue operations provide detailed articles and guides․
These platforms often feature expert insights into band riders, negotiation tactics, and legal considerations, updated regularly to reflect current industry practices․ Pollstar and Billboard frequently publish relevant articles․
Professional organizations like the International Association of Venue Managers (IAVM) offer valuable resources, including webinars and white papers, accessible to members and sometimes publicly available․
Online forums and communities for tour managers and venue staff provide a space for sharing experiences and best practices regarding rider fulfillment․
Furthermore, legal blogs specializing in entertainment law often address the contractual aspects of hospitality riders, offering clarity on liabilities and obligations․
Leveraging these online resources ensures access to accurate, up-to-date information without the security risks associated with downloading PDFs from unofficial sources․
The Future of Hospitality Riders: Trends and Predictions

Looking ahead, hospitality riders are poised for significant evolution, driven by shifting artist priorities and technological advancements․ A growing emphasis on sustainability will likely lead to requests for locally sourced, organic catering and eco-friendly amenities․
Increased focus on artist wellness may result in demands for dedicated relaxation spaces, healthy food options, and access to fitness facilities․ Digital riders, utilizing online platforms for streamlined communication and request management, are gaining traction․
Personalization will become key, with artists expecting highly tailored experiences reflecting their individual preferences․ Expect more detailed specifications regarding dietary restrictions, allergies, and preferred brands․
The rise of virtual and hybrid events may introduce new rider elements, such as requirements for high-bandwidth internet connectivity and professional-grade streaming equipment․
Data analytics could play a role, allowing venues to anticipate artist needs and proactively address potential issues․ Transparency and clear communication will be crucial for successful rider negotiation․
Ultimately, the future of hospitality riders will be shaped by a collaborative approach, balancing artist expectations with venue capabilities and budgetary constraints․
Resources for Further Research: Industry Websites & Publications
For those seeking deeper understanding of hospitality riders and the broader “unreasonable hospitality” phenomenon, several valuable resources are available․ Pollstar and Billboard consistently offer industry news, including insights into touring logistics and artist demands․
VenuesNow provides a venue-centric perspective, covering rider negotiations and operational challenges․ Trade organizations like the International Association of Venue Managers (IAVM) offer educational materials and networking opportunities․
Publications such as Backstage frequently feature articles on touring life and rider quirks․ Online forums and communities dedicated to concert production and tour management can provide practical advice and real-world experiences․

Academic databases may contain research on contract law and the legal aspects of hospitality riders․ Exploring artist biographies and autobiographies can offer firsthand accounts of rider requests․
Remember to critically evaluate information sources and prioritize reputable publications and organizations․ While a comprehensive “unreasonable hospitality” PDF may be elusive, these resources collectively offer a wealth of knowledge․
Continual learning and staying abreast of industry trends are essential for navigating the complexities of hospitality riders․