Category Archives: Manuals

lasko heater user manual

Lasko Heater User Manual: A Comprehensive Guide

Welcome! This manual provides essential guidance for safely and effectively operating your Lasko ceramic heater, ensuring optimal performance and lasting comfort within your home.

Lasko has been a trusted name in home comfort for over a century, dedicated to providing innovative and reliable heating solutions. Our heaters are engineered to deliver safe, efficient warmth, enhancing the comfort of your living spaces. From compact ceramic towers to powerful pedestal heaters, Lasko offers a diverse range of models to suit various needs and room sizes.

This user manual is designed to familiarize you with your Lasko heater, covering essential aspects from safety precautions and operational instructions to maintenance guidelines and troubleshooting tips. Whether you’ve chosen a basic model or a feature-rich digital heater, understanding its functionalities will maximize its benefits and ensure years of dependable service. We prioritize your safety and satisfaction, so please read this manual thoroughly before use.

Understanding Your Lasko Model (755320 & Others)

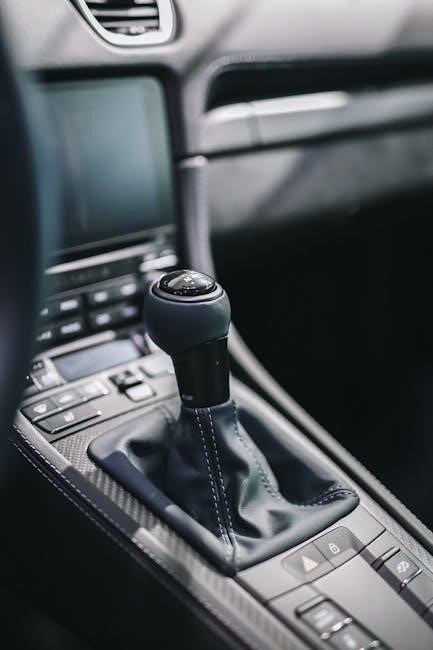
Lasko heaters, like the popular 755320, are designed for indoor use, providing efficient and targeted warmth. Key components include a ceramic heating element for fast and consistent heat, an oscillating function for wider room coverage, and adjustable thermostat controls for personalized comfort. Many models feature remote control operation for convenient adjustments from across the room.

Different Lasko models offer varying features, such as multiple heat settings (High/Low), timer functions, and digital displays. The pedestal design in some models elevates the heat output to seated height, enhancing warmth where you need it most. Familiarize yourself with the specific controls and features of your Lasko heater model for optimal performance and safety.

Safety Precautions

Important Safety Instructions: Always operate your Lasko heater on a stable, level surface, away from flammable materials. Never leave the heater unattended while in use. Keep the air intakes and outlets clear of obstructions to prevent overheating. Do not use extension cords; plug directly into a wall outlet.

This heater is intended for indoor use only. Avoid using in damp or wet environments, such as bathrooms. Disconnect the heater when not in use and before cleaning. Supervise children and pets closely when the heater is operating. If the power cord is damaged, discontinue use immediately and contact Lasko customer care for assistance.

Key Features of Lasko Ceramic Heaters

Experience Efficient Warmth: Lasko ceramic heaters utilize self-regulating ceramic heating elements for consistent and safe warmth. Many models feature oscillation for wide-area heating, with adjustable settings like 90, 170, and 360 degrees. Enjoy precise temperature control with adjustable thermostats and multiple heat settings – high, low, and auto.

Convenience is key with features like remote control operation and programmable timers, allowing for customized comfort. The elevated designs of pedestal heaters deliver warmth at seated height. Lasko heaters are designed for quiet operation, making them ideal for bedrooms and offices.

Oscillation Settings (90, 170, 360 Degrees)

Maximize Warmth Distribution: Lasko heaters offer versatile oscillation settings to customize your heating experience. The 90-degree setting provides a focused stream of warmth, ideal for direct heating. Selecting 170 degrees expands the coverage area, offering broader comfort. For full-room heating, utilize the 360-degree oscillation, circulating warm air throughout the space.

These settings allow you to tailor the heater’s output to your specific needs and room size. Easily adjust the oscillation angle using the heater’s controls or the included remote, ensuring consistent and even warmth wherever you desire. Enjoy full-circle warmth with Lasko!

Adjustable Thermostat Control

Precise Temperature Management: Lasko heaters feature an adjustable thermostat, allowing you to maintain your desired comfort level effortlessly. Simply set the thermostat to your preferred temperature, and the heater will automatically cycle on and off to maintain that setting. This feature promotes energy efficiency by preventing overheating and unnecessary energy consumption.

The adjustable thermostat ensures consistent warmth without manual adjustments. Whether you prefer a cozy warmth or a more moderate temperature, Lasko’s thermostat control provides personalized comfort. Enjoy a consistently comfortable environment with minimal effort!

Operating Instructions: Basic Use

Simple and Intuitive Operation: Using your Lasko heater is straightforward. First, ensure the heater is placed on a stable, level surface, away from flammable materials. Plug the heater into a standard electrical outlet. To begin, press the power button to activate the unit; Next, select your desired heat setting – High for rapid warming or Low for sustained comfort.

Utilize the adjustable thermostat to fine-tune the temperature to your preference. For wider heat distribution, activate the oscillation feature. Remember to always supervise the heater during operation and unplug it when not in use.

Powering On and Off

Effortless Control: To power on your Lasko heater, locate the clearly marked power button on the control panel or remote control. A single press will activate the unit, initiating the heating process. The heater will typically default to the previously selected heat setting and thermostat level.

To power off, simply press the power button again. The heater will cease operation, and the indicator lights will turn off. Always ensure the heater is completely powered off before unplugging it from the electrical outlet. This prevents potential damage and ensures safe operation.

Selecting Heat Settings (High/Low)

Customizable Warmth: Your Lasko heater offers two primary heat settings – High and Low – allowing you to tailor the warmth to your specific needs and preferences. The ‘High’ setting delivers maximum heat output, ideal for quickly warming up a cold room or providing intense warmth during particularly chilly conditions.

The ‘Low’ setting provides a gentler, more sustained heat, perfect for maintaining a comfortable temperature without overheating. To switch between settings, simply press the designated ‘Heat’ button on the control panel or remote. Observe the indicator light to confirm your selected heat level.

Remote Control Functionality

Convenient Control: Your Lasko heater includes a remote control for effortless operation from across the room. This allows you to adjust settings without needing to physically interact with the unit, enhancing convenience and comfort. The remote replicates most of the functions available on the heater’s control panel, including power, heat settings, oscillation, and timer adjustments.

Ensure the remote is pointed towards the heater’s receiver for optimal performance. For best results, replace the batteries (typically AAA) when the remote’s responsiveness diminishes. Keep the remote in a safe, dry location when not in use to prolong its lifespan.

Pairing the Remote

Initial Setup: In most cases, your Lasko heater and remote come pre-paired from the factory. However, if the remote isn’t responding, a re-pairing process might be necessary. Begin by ensuring the heater is plugged in and powered on. Locate the “Pair” or “Reset” button on either the heater itself or the remote control – consult your specific model’s diagram for its exact location.

Press and hold this button for approximately 5-10 seconds. The heater may display a pairing indicator, such as a flashing light. Once paired, the remote should control the heater’s functions. If pairing fails, repeat the process, ensuring no other electronic devices interfere.

Remote Button Descriptions

Power Button: Turns the heater on and off. Heat Settings: Select between High and Low heat output levels for customized warmth. Oscillation: Activates or deactivates the oscillation feature, distributing heat across a wider area – options include 90, 170, and 360-degree sweeps. Thermostat Control: Adjusts the desired room temperature; the heater will cycle to maintain this setting.

Timer: Sets an automatic shut-off timer, ranging up to 12 hours. Fan Only: Operates the fan without heat for cooling circulation. Mode: Cycles through available modes, if applicable. Ensure batteries are fresh for optimal remote functionality.

Timer Function: Setting and Using

Setting the Timer: Press the “Timer” button on either the heater control panel or the remote control. Each press typically increments the timer by one hour, up to a maximum of 12 hours. A display indicator will show the remaining time. Using the Timer: Once set, the heater will automatically shut off after the programmed duration.

Cancelling the Timer: To cancel the timer, repeatedly press the “Timer” button until the display shows “0H”. The heater will then operate continuously until manually turned off. Remember to check the timer setting each time you restart the heater for desired operation.

Cleaning and Maintenance

Regular cleaning ensures optimal performance and longevity of your Lasko heater. Before cleaning, always unplug the unit and allow it to cool completely. Exterior Cleaning: Wipe the exterior surfaces with a soft, damp cloth. Avoid using abrasive cleaners or solvents, as they can damage the finish.

Air Filter Maintenance: If your model has an air filter, periodically check and clean it. A clogged filter restricts airflow and reduces efficiency. Remove the filter (refer to your model’s specific instructions) and gently vacuum or wash it. Ensure the filter is completely dry before reinstalling.

Exterior Cleaning

Maintaining a clean exterior is crucial for the appearance and proper function of your Lasko heater. Always disconnect the heater from the power outlet and allow it to cool down completely before beginning any cleaning procedures. Use a soft, damp cloth to gently wipe down the exterior surfaces, removing dust and debris.

Avoid harsh chemicals, abrasive cleaners, or solvents, as these can potentially damage the plastic or painted finishes. For stubborn marks, a mild soap solution can be used, but ensure it’s thoroughly rinsed and the surface is dried afterward. Regular dusting will prevent buildup and keep your Lasko heater looking its best.

Air Filter Maintenance (If Applicable)

Certain Lasko models are equipped with an air filter designed to trap dust and particles, ensuring cleaner heated air. Check your specific model’s documentation to confirm if it has a filter and its location. Regular filter maintenance is vital for optimal performance.

To clean the filter, disconnect the heater and locate the filter access panel. Remove the filter and gently vacuum it to remove loose dust. If heavily soiled, wash it with mild soap and water, ensuring it’s completely dry before reinstalling. Replace the filter if it’s damaged or cannot be adequately cleaned; refer to your model’s parts list for replacement options.

Troubleshooting Common Issues

If your Lasko heater isn’t turning on, first ensure it’s properly plugged into a working outlet. Check the power cord for damage. For insufficient heat, verify the heat setting is appropriately selected (High or Low) and the thermostat isn’t set too low. A clogged air filter can also reduce heat output – see the ‘Air Filter Maintenance’ section.

If the remote isn’t working, replace the batteries and ensure it’s paired correctly with the heater (refer to ‘Remote Control Functionality’). If issues persist, try resetting the heater by unplugging it for a few minutes. For further assistance, consult the Lasko Customer Care Center.

Heater Not Turning On

If your Lasko heater fails to power on, begin by confirming it’s securely plugged into a functioning electrical outlet. Test the outlet with another device to rule out a power supply issue. Inspect the power cord carefully for any visible signs of damage, such as cuts or fraying. A damaged cord presents a safety hazard and should not be used.

Check the unit’s internal fuse (if applicable, consult your specific model’s documentation). Ensure the thermostat is set to a temperature higher than the current room temperature. If problems continue, unplug the heater and allow it to cool before attempting further troubleshooting. Contact Lasko Customer Care if the issue remains unresolved.

Insufficient Heat Output

If your Lasko heater isn’t producing enough warmth, first verify that you’ve selected the desired heat setting – High or Low. Ensure the thermostat is set to a sufficiently high temperature; a lower setting will naturally limit heat output. Confirm the air filter (if your model has one) is clean and free of obstructions, as a clogged filter restricts airflow.

Check for anything blocking the heater’s air intake or exhaust vents. The heater’s proximity to cold surfaces, like windows, can also affect performance. Allow sufficient space around the unit for proper air circulation. If the problem persists, contact Lasko Customer Care for assistance.

Remote Control Not Working

If your Lasko heater’s remote isn’t responding, begin by ensuring fresh batteries are correctly installed, observing proper polarity. Verify there are no obstructions between the remote and the heater’s receiver. Attempt to re-pair the remote with the heater, following the pairing instructions detailed in the “Pairing the Remote” section of this manual.

Confirm the remote’s buttons are functioning by testing them individually. If the issue continues, try resetting the heater by unplugging it for several minutes and then plugging it back in. Contact Lasko Customer Care if re-pairing and resetting don’t resolve the problem.

Lasko Customer Care & Resource Center

Need assistance with your Lasko heater? Our dedicated Customer Care Center is a valuable resource for product information, troubleshooting, and support. We understand common questions arise, so we’ve created a comprehensive Resource Center available online. Find helpful FAQs, detailed product manuals, and instructional videos to address many concerns independently.

For personalized assistance, contact our customer support team directly via phone or email. We are committed to providing prompt and helpful solutions to ensure your satisfaction with your Lasko product. Visit our website to access the Resource Center and contact information.

Specific Model Features: Digital Ceramic Pedestal Heater

The Digital Ceramic Pedestal Heater offers enhanced comfort with its elevated design, directing warmth at seated height for optimal efficiency. This 1500-watt model features an adjustable thermostat, allowing precise temperature control to maintain your desired comfort level. Benefit from two distinct heat settings – High for rapid warming and Low for sustained, gentle heat.

Enjoy even heat distribution throughout the room thanks to the pedestal design and optional oscillation. The integrated digital controls and included remote provide convenient operation. Experience a blend of powerful heating and user-friendly features with this versatile Lasko model.

Energy Saving Tips for Lasko Heaters

Maximize efficiency with your Lasko heater by utilizing the adjustable thermostat; set it to the lowest comfortable setting to reduce energy consumption; Leverage the timer function to automatically turn off the heater when not needed, preventing wasted electricity. Focus heating on occupied rooms only, closing vents in unused spaces.

Consider using the “Auto” thermostat mode, allowing the heater to cycle on and off to maintain a consistent temperature. Regularly clean the air filter (if applicable) to ensure optimal airflow and heating performance. Combine with other energy-saving practices, like wearing warmer clothing, for even greater savings.

Warranty Information

Lasko products are warranted against defects in materials and workmanship for a period of one year from the date of original purchase. This warranty covers normal household use and does not cover damage resulting from misuse, abuse, or unauthorized repairs. Proof of purchase is required for all warranty claims.

To obtain warranty service, contact Lasko Customer Care with details of the issue and your purchase information. Lasko will, at its discretion, repair or replace the defective product. This warranty gives you specific legal rights, and you may have other rights which vary from state to state. See Lasko’s official website for complete warranty details.

Technical Specifications (Wattage, Voltage)

The Lasko 755320 and similar models typically operate at 120 Volts and a maximum wattage of 1500 Watts. These heaters are designed for standard household electrical outlets. Power consumption will vary depending on the selected heat setting – High (1500W) provides maximum heat, while Low utilizes less power.

Always ensure your electrical circuit can handle the heater’s wattage to prevent overloading. Refer to the rating label on the heater itself for precise specifications related to your specific model. Using an extension cord is not recommended; if necessary, use a heavy-duty cord rated for the heater’s wattage.

Storage Instructions

Before storing your Lasko heater for extended periods, ensure it is completely cool and dry. Clean the exterior with a soft, damp cloth and the air filter (if applicable) according to the maintenance instructions. Store the heater in a cool, dry location, away from direct sunlight and extreme temperatures.

Keep the original packaging for safe storage and transportation. Avoid placing heavy objects on top of the heater during storage, as this could cause damage. Coil the power cord loosely to prevent kinks or breaks. Regularly inspect the heater for any signs of damage before each use after storage;

jeep jk manual transmission

Jeep JK Manual Transmission: A Comprehensive Guide

The Jeep JK’s robust manual transmission offers a uniquely engaging driving experience, blending durability with off-road capability for enthusiasts seeking control and connection.

For Jeep JK owners who prefer a more connected driving experience, the manual transmission offers a compelling alternative to the automatic. Produced from 2007 through 2018, the JK generation provided a capable platform, and the availability of a six-speed manual gearbox – the NSG330 – added a layer of driver involvement often sought after by off-road enthusiasts and purists.

This guide delves into the specifics of the JK’s manual transmission, covering everything from its core components and performance characteristics to common issues, maintenance procedures, and potential upgrades. Whether you’re a seasoned mechanic or a relatively new JK owner, understanding your transmission is crucial for maximizing your Jeep’s performance and longevity. We’ll explore the nuances of the NSG330, helping you diagnose problems, perform basic maintenance, and make informed decisions about modifications.

Ultimately, this resource aims to empower you with the knowledge needed to keep your JK’s manual transmission running smoothly for years to come, enhancing your adventures both on and off the pavement.

Why Choose a Manual JK? (Pros & Cons)

Opting for a Jeep JK with a manual transmission presents a unique set of advantages and disadvantages. On the positive side, a manual gearbox provides greater driver control, particularly beneficial during challenging off-road situations requiring precise engine braking and gear selection. Many enthusiasts appreciate the more engaging and connected driving experience, fostering a stronger bond with the vehicle.

Furthermore, manual JKs often command a slightly lower price on the used market. However, there are drawbacks to consider. Learning to operate a manual transmission can be challenging for some, and it may be less convenient in stop-and-go traffic. The NSG330, while generally reliable, has known weaknesses, and finding a skilled mechanic familiar with it can sometimes be difficult.

Ultimately, the decision hinges on your driving preferences and intended use. If you value control, engagement, and aren’t deterred by a steeper learning curve, a manual JK might be the perfect choice.

Understanding the NSG330 Transmission

The New Venture Gear NSG330 is a five-speed manual transmission specifically designed for the Jeep JK Wrangler and is known for its ruggedness.

NSG330: The Core of the JK Manual System

At the heart of the Jeep JK’s manual drivetrain lies the New Venture Gear NSG330 transmission. This robust unit, manufactured by New Venture Gear (a joint venture between Chrysler and Magna), was specifically engineered to handle the demands of both on-road driving and challenging off-road trails.

Its internal construction features durable gears and shafts, designed to withstand the torque produced by the JK’s engine options – the 3.8L V6 and the 3.6L Pentastar V6. The NSG330 is a fully synchronized transmission, providing smooth and reliable gear changes.

Unlike some lighter-duty manual transmissions, the NSG330 is known for its strength and ability to cope with modifications, such as engine swaps or lift kits that increase tire size and drivetrain stress. It’s a key component in the JK’s reputation for being a capable and dependable off-road vehicle, offering drivers a direct mechanical connection to the powertrain.

Gear Ratios and Their Impact on Performance

The NSG330 transmission in the Jeep JK utilizes specific gear ratios that significantly influence vehicle performance characteristics. First gear is typically geared low for maximizing torque and enabling rock crawling or steep incline ascents. Higher gears, such as fifth and sixth, are designed for efficient highway cruising, reducing engine RPMs and improving fuel economy.

The stock gear ratios are a compromise, balancing off-road capability with on-road drivability. However, altering these ratios – through changing the differential gears – can dramatically change the JK’s behavior. Lower (numerically higher) ratios enhance low-end torque, ideal for larger tires and demanding trails.

Conversely, higher (numerically lower) ratios improve top-end speed and fuel efficiency, better suited for primarily highway driving. Selecting the appropriate gear ratio depends heavily on the intended use of the vehicle and tire size, impacting acceleration, towing capacity, and overall driving experience.

Common NSG330 Identification Methods

Identifying your Jeep JK’s NSG330 transmission is crucial for sourcing correct parts and understanding its specific configuration. The most reliable method involves locating the transmission’s identification tag. This tag is typically found on the transmission case itself, often near the bellhousing or on the side.

The tag will contain a series of numbers and letters, including the transmission model number (NSG330) and potentially a date code indicating when it was manufactured. Another clue is the input shaft spline count; the NSG330 generally features a 23-spline input shaft.

Visual inspection can also offer hints. While subtle, variations exist in case castings and mounting points over the years. Checking the vehicle’s build sheet or contacting a Jeep dealership with your VIN can provide definitive transmission information. Accurate identification prevents compatibility issues during repairs or upgrades.

Maintenance & Fluid Considerations

Regular maintenance and proper fluid levels are paramount for the longevity of your Jeep JK’s manual transmission, ensuring smooth operation and preventing costly damage.

Recommended Transmission Fluid Type

Selecting the correct transmission fluid is crucial for the NSG330 found in Jeep JKs. Chrysler originally specified Mopar MS-9224, a specific GL-3 fluid. However, sourcing this exact fluid can sometimes be challenging. Many JK owners have successfully used high-quality GL-3 gear oils from reputable brands like Red Line, Amsoil, or Valvoline, ensuring they meet or exceed the MS-9224 specification.

Avoid using GL-5 fluids, as they contain additives (like sulfur) that can corrode the brass synchronizers within the NSG330, leading to grinding and eventual transmission failure. Synthetic fluids are generally preferred for their superior thermal stability and longer service life, especially in demanding conditions like off-roading. Always double-check the fluid’s compatibility and specifications before adding it to your transmission. Using the wrong fluid voids warranties and can cause significant, expensive damage.

Fluid Change Intervals & Procedures

Regular transmission fluid changes are vital for maintaining the health of your Jeep JK’s NSG330. A good baseline is to change the fluid every 30,000 miles, or every 2 years, whichever comes first. However, if you frequently engage in demanding off-road driving, towing, or operate in extreme temperatures, shortening the interval to 15,000-20,000 miles is recommended.

The procedure involves removing the fill plug first (to ensure you can refill!), then the drain plug, allowing the old fluid to drain completely. Replace the drain plug with a new crush washer. Refill with the specified fluid (see previous section) until it reaches the fill plug opening. Check the fluid level while the transmission is at operating temperature. Avoid overfilling. Properly dispose of the used fluid at a recycling center. A fluid change typically requires around 2.5-3 quarts.

Checking Fluid Levels – A Step-by-Step Guide

Accurate fluid level checks are crucial for identifying potential transmission issues. First, ensure your Jeep JK is parked on a level surface and the engine is warmed up to operating temperature. Locate the fill plug on the transmission – it’s typically on the side.

Carefully remove the fill plug. With the transmission at operating temperature, the fluid level should be right at the bottom of the fill plug opening. If it’s low, add the recommended fluid slowly until it just begins to drip out. Replace the fill plug with a new crush washer, tightening it to the specified torque.

Important: The NSG330 doesn’t have a traditional dipstick. Always check the fluid when warm, as levels change significantly with temperature. Low fluid can indicate a leak, while overfilling can cause aeration and damage.

Common Issues & Troubleshooting

JK manual transmissions, while durable, can experience issues like grinding gears, clutch failures, and shifter problems; prompt diagnosis ensures continued off-road enjoyment.

Grinding Gears: Causes and Solutions

Gear grinding in your Jeep JK’s manual transmission is a common, yet concerning, symptom. Several factors can contribute to this issue. The most frequent cause is a worn synchronizer, responsible for matching the speeds of gears during shifts; Aggressive or rushed shifting exacerbates wear.

Low or contaminated transmission fluid can also hinder proper synchronization, leading to grinding. A failing clutch, not fully disengaging, can cause the transmission to attempt shifts while still engaged with the engine. Improper clutch adjustment plays a role here.

Solutions range from simple to complex. Begin by checking and topping off, or changing, the transmission fluid. Ensure the clutch is properly adjusted. If grinding persists, a synchronizer replacement is likely necessary, requiring transmission disassembly. Inspect the clutch disc and pressure plate for wear during this process. Ignoring grinding can lead to further damage to the gears themselves, escalating repair costs significantly.

Clutch Problems: Slipping, Sticking, and Failure

Clutch issues are frequent concerns with the Jeep JK manual transmission. Slipping occurs when the clutch disc doesn’t fully engage, causing engine RPM to rise without a corresponding increase in speed – often noticeable during acceleration or uphill climbs. This usually indicates wear on the clutch disc’s friction material.

Sticking, where the clutch pedal feels difficult to depress or doesn’t return smoothly, suggests a problem with the clutch cable, hydraulic system (if equipped), or potentially a warped clutch disc. Complete failure manifests as an inability to engage any gear.

Solutions include clutch cable adjustment or replacement, bleeding the hydraulic system, or a full clutch kit replacement (disc, pressure plate, and throw-out bearing). Ignoring these symptoms can lead to further damage to the flywheel and transmission. Regular inspection and proactive maintenance are crucial for a long-lasting clutch.

Shifter Issues: Sloppy Feel & Difficulty Selecting Gears

A vague or “sloppy” shifter feel in your Jeep JK’s manual transmission often indicates worn components within the shifter assembly itself. This can range from loose bushings to internal wear on the shift rails. Difficulty selecting gears, particularly first or reverse, frequently accompanies this sensation.

Common causes include worn shifter bushings (plastic or rubber), a bent or damaged shift lever, or internal wear within the transmission’s shift forks. Sometimes, a simple adjustment of the shift linkage can improve the situation, but often, replacement of worn parts is necessary.

Solutions involve replacing the shifter bushings with upgraded polyurethane or brass alternatives, inspecting the shift lever for damage, and potentially rebuilding or replacing the entire shifter assembly. Addressing these issues restores precise gear selection and enhances the driving experience. Ignoring them can lead to missed shifts and potential transmission damage.

Throw-Out Bearing Failure – Symptoms & Repair

The throw-out bearing (also called a release bearing) is crucial for disengaging the clutch. Failure manifests as a whining or chirping noise, often loudest when the clutch pedal is depressed. This sound typically disappears when the pedal is released. Ignoring this symptom can lead to complete bearing failure, rendering the clutch unusable.

Symptoms also include difficulty shifting, a pulsating clutch pedal, and in severe cases, a grinding noise during gear changes. The bearing’s lifespan is affected by driving habits and clutch usage. Frequent towing or aggressive driving accelerates wear.

Repair requires transmission removal to access the throw-out bearing. It’s highly recommended to replace the clutch disc, pressure plate, and pilot bearing simultaneously, as the labor is substantial. A worn clutch will quickly damage a new throw-out bearing. Proper lubrication during installation is vital for longevity.

Upgrades & Modifications

Enhance your JK’s manual transmission with performance upgrades, improving shift quality, clutch durability, and overall driving enjoyment for both on-road and off-road adventures.

Short Throw Shifters: Improving Shift Feel

For JK Wrangler owners desiring a more connected and precise driving experience, a short throw shifter is a popular and effective upgrade. The factory shifter, while functional, often suffers from long throws and a somewhat vague feel. Short throw shifters reduce the distance the lever travels between gears, resulting in quicker, more direct shifts.

Several manufacturers offer short throw shifters for the JK, each with varying degrees of reduction and design. Some utilize a different pivot point, while others modify the internal linkage. Installation is typically straightforward for mechanically inclined individuals, often requiring only basic hand tools.

Benefits extend beyond quicker shifts; a short throw shifter can improve driver confidence and control, especially during spirited driving or technical off-road maneuvers. Expect a firmer, more positive engagement, minimizing missed shifts. Consider the intended use – a more aggressive reduction might be ideal for performance driving, while a moderate reduction suits daily driving and moderate off-roading.

Clutch Upgrades: Handling More Power

As Jeep JK Wranglers are frequently modified with larger tires, lift kits, and engine upgrades, the factory clutch may struggle to handle the increased demands. A slipping clutch manifests as engine RPMs rising without a corresponding increase in vehicle speed, indicating insufficient clamping force. Upgrading the clutch is crucial for reliability and performance;

Several clutch options are available, ranging from heavy-duty replacements to full performance clutches. Key components to consider include the pressure plate, disc, and throw-out bearing. Upgraded pressure plates provide increased clamping force, while performance discs often feature more aggressive friction materials.

Choosing the right clutch depends on the extent of modifications and intended use. A mild upgrade may suffice for moderate tire size increases, while significant engine modifications necessitate a more robust, performance-oriented clutch. Installation typically requires removing the transmission, making it a more involved repair best suited for experienced mechanics or professional installation;

Transmission Mounts: Reducing Vibration

Factory Jeep JK transmission mounts, while functional, can transmit significant vibrations into the chassis, particularly with larger tires or aftermarket modifications. These vibrations contribute to driver fatigue and can potentially lead to stress fractures in surrounding components over time. Upgrading to aftermarket transmission mounts offers a substantial improvement in ride quality and overall refinement.

Aftermarket mounts typically utilize different materials and designs to isolate vibrations more effectively. Options range from polyurethane mounts, which offer increased stiffness and reduced deflection, to fluid-filled mounts that provide superior vibration damping. Polyurethane mounts are popular for performance applications, while fluid-filled mounts prioritize comfort.

Installation is relatively straightforward, involving unbolting the old mount and replacing it with the new one. However, proper torque specifications must be followed to ensure secure mounting and prevent premature failure. Upgrading the transmission mount is a cost-effective modification that significantly enhances the driving experience of a JK Wrangler.

Gear Ratio Changes: Optimizing for Different Terrain

Altering the gear ratios in your Jeep JK’s manual transmission and axles is a crucial step in tailoring its performance to your specific needs. The factory gear ratios are a compromise, suitable for general use, but often suboptimal for dedicated off-roading or highway cruising. Lower (numerically higher) gear ratios, like 4.88 or 5.13, provide increased torque multiplication, ideal for overcoming obstacles and climbing steep inclines.

Conversely, higher (numerically lower) gear ratios, such as 3.73, improve fuel economy and reduce engine RPM at highway speeds, making long drives more comfortable. Re-gearing involves replacing the pinion and ring gears within the differentials and potentially changing the transfer case gearing.

It’s essential to consider tire size when selecting new gear ratios; larger tires effectively lower the overall gear ratio, necessitating a corresponding change in the differential gears to restore optimal performance. Professional installation and proper break-in procedures are highly recommended for longevity and smooth operation.

DIY Repairs vs. Professional Service

Assess your mechanical skills and tool availability; simpler tasks suit DIY, while complex issues—like transmission rebuilds—demand a qualified mechanic’s expertise and specialized tools.

When to Tackle Repairs Yourself

For the mechanically inclined Jeep JK owner, several manual transmission-related repairs are within the realm of DIY possibility. These typically include fluid changes, a relatively straightforward process requiring basic tools and adherence to proper procedures. Inspecting and replacing the shift linkage bushings is another accessible task, often resolving sloppy shifting without extensive disassembly.

Similarly, diagnosing and replacing a worn clutch master or slave cylinder can be managed with moderate mechanical experience and a good understanding of hydraulic systems. Simple shifter adjustments, addressing minor play or stiffness, are also suitable for DIY attention. However, always prioritize safety – use jack stands, disconnect the battery, and consult reliable repair manuals.

Remember to accurately diagnose the problem before diving in; a misdiagnosis can lead to wasted time and money. If you’re comfortable with these types of repairs and possess the necessary tools, tackling them yourself can save on labor costs and provide a rewarding sense of accomplishment.

When to Seek Professional Assistance

Despite the appeal of DIY repairs, certain Jeep JK manual transmission issues demand the expertise of a qualified mechanic. Internal transmission work, such as rebuilding or replacing gears, requires specialized tools, knowledge, and a clean working environment to avoid further damage. Similarly, diagnosing and resolving complex issues like persistent grinding, especially in multiple gears, often necessitates professional diagnostic equipment.

Any suspected damage to the transmission case, input shaft, or output shaft should be addressed by a professional. Clutch failures involving significant component damage, beyond simple disc replacement, also fall into this category. If you lack experience with hydraulic systems, bleeding the clutch line after a repair is best left to a pro.

Ultimately, if you’re unsure about your abilities or the severity of the problem, erring on the side of caution and seeking professional assistance is always the wisest course of action, preventing potentially costly mistakes.

Resources & Further Information

Explore dedicated online Jeep JK forums, reputable parts retailers, and detailed technical manuals for invaluable insights and support regarding your transmission.

Online Forums & Communities

Numerous online Jeep JK forums and communities serve as invaluable resources for owners of these vehicles, particularly those with manual transmissions. These platforms offer a space to connect with fellow enthusiasts, share experiences, and seek advice on everything from routine maintenance to complex repairs.

Popular forums like JeepForum.com and JK-Forum.com have dedicated sections specifically for the JK Wrangler and its manual transmission. You’ll find threads discussing common issues, upgrade options, and DIY repair guides. Members often post detailed information, photos, and videos to help others troubleshoot problems and improve their JK’s performance.

Facebook groups dedicated to Jeep JK owners are also abundant and provide a more immediate and interactive environment. These groups are excellent for quick questions, local meetups, and sharing real-time experiences. Don’t hesitate to search for and join relevant groups to tap into a wealth of collective knowledge. Remember to utilize the search function within these communities before posting, as your question may have already been answered!

Parts Suppliers & Retailers

Sourcing parts for your Jeep JK’s manual transmission is readily achievable through a variety of suppliers and retailers, catering to diverse budgets and needs. Several companies specialize in Jeep parts, offering both OEM (Original Equipment Manufacturer) and aftermarket options.

Quadratec and Morris 4×4 Center are well-established retailers with extensive catalogs, including transmission components, clutches, shifters, and fluids. They often provide detailed product descriptions and customer reviews to aid in your selection. RockAuto is another popular choice, known for its competitive pricing on a wide range of auto parts.

For specialized upgrades, consider companies like Novak Conversions, which focuses on drivetrain solutions, or Eaton, a leading manufacturer of clutches and transmissions. Local Jeep dealerships can supply OEM parts, ensuring compatibility, but typically at a higher cost. Always verify the part’s compatibility with your specific JK model year and transmission type before purchasing. Comparing prices and reading reviews is highly recommended.

Technical Service Manuals & Diagrams

Accessing detailed technical information is crucial for successful JK manual transmission maintenance and repair. The official Jeep Workshop Service Manual provides comprehensive instructions, diagrams, and torque specifications, covering everything from fluid changes to complete transmission overhauls.

These manuals, often available in digital format, are invaluable for DIY mechanics. Haynes and Chilton manuals offer a more simplified approach, suitable for less experienced individuals, though they may lack the depth of the official Jeep manual. Online resources, such as JeepForum and dedicated JK owner groups, frequently host scanned diagrams and troubleshooting guides.

Wiring diagrams relating to transmission sensors (like the speed sensor) are also essential for diagnosing electrical issues. Websites specializing in automotive diagrams can be helpful. Remember that accurate information is paramount; always cross-reference data from multiple sources and prioritize the official Jeep service manual whenever possible for reliable guidance and safety.

Maintaining your Jeep JK’s manual transmission proactively is key to enjoying years of reliable performance, both on and off the road. Regular fluid checks and timely changes, using the correct fluid type, are fundamental to longevity. Addressing minor issues – like a slightly sloppy shifter – promptly prevents them from escalating into costly repairs.

Don’t underestimate the value of preventative maintenance. Inspecting clutch components and transmission mounts periodically can identify potential problems before they cause breakdowns. Understanding the transmission’s limitations and driving accordingly also contributes significantly to its lifespan.

Whether you choose to tackle maintenance yourself or rely on a professional mechanic, prioritizing the health of your JK’s manual transmission ensures a continued, engaging, and capable driving experience. A well-maintained JK will reward you with years of adventurous journeys!

kenmore elite top load washer manual

Kenmore Elite Top Load Washer Manual: A Comprehensive Guide

This manual provides detailed instructions for Kenmore Elite top load washers, including models 41072, 41782, and 31633,
offering superior cleaning and large capacity for families.

Understanding Your Kenmore Elite Top Load Washer

Your Kenmore Elite top load washer is engineered for powerful cleaning and reliable performance. These washers, like models 41072 and 31633, are designed to handle substantial laundry loads, making them ideal for families or individuals with larger washing needs. Consumer Reports testing highlights the Elite series’ capabilities, particularly in stain removal – the 31633 achieved the highest score among top-loaders tested.

Understanding the washer’s components and features is key to maximizing its efficiency. The large drum capacity distinguishes these models from standard washers, allowing for fewer loads. The Elite series balances advanced technology with user-friendly operation. Familiarizing yourself with the control panel and cycle options will ensure you select the appropriate settings for your laundry type, optimizing cleaning results and fabric care. Proper usage extends the lifespan of your appliance.

Model Numbers and Variations

Kenmore Elite top load washers come in several model numbers, each with slight variations in features and specifications. Commonly referenced models include 41072, 41782, and 31633. The 41072 is noted for its large capacity, exceeding that of many front-load washers, a benefit for larger households. Model 41782 undergoes rigorous testing by Consumer Reports, evaluated on criteria like performance and efficiency.

The 31633 stands out for its exceptional stain removal capabilities, achieving top scores in independent testing. While core functionality remains consistent across the Elite line, variations may exist in cycle options, control panel design, and specific wash settings. Always refer to the specific model number on your appliance and corresponding documentation for accurate information regarding its unique features and capabilities. Sears offers the 31633 model.

Key Features and Benefits

Kenmore Elite top load washers are engineered for powerful cleaning and user convenience; A primary benefit is their substantial drum capacity, accommodating larger laundry loads – particularly advantageous for families. Independent testing, like that conducted by Consumer Reports on the 41782 model, highlights their above-average cleaning performance. The 31633 model specifically excels in stain removal, achieving the highest scores among top-load washers tested.

These washers often include a range of wash cycles tailored to different fabric types and soil levels. Features contribute to efficient water and energy usage. The robust construction and advanced wash technology ensure reliable operation and long-lasting performance. Kenmore Elite washers aim to deliver a balance of cleaning power, capacity, and convenience, simplifying laundry day for users.

Operating Instructions

Proper operation ensures optimal performance and longevity of your Kenmore Elite washer. Carefully follow guidelines for loading, detergent use, and cycle selection for best results.

Loading and Unloading Laundry

To maximize cleaning efficiency and prevent damage, proper loading techniques are crucial with your Kenmore Elite top load washer. Distribute items loosely within the drum, avoiding tightly packed bundles, as this restricts water circulation and hinders effective washing.

For optimal results, do not overload the washer; refer to the capacity guidelines in this manual. Overloading can strain the motor and reduce cleaning performance. When loading, alternate between large and small items to maintain balance.

Before starting a cycle, ensure all pockets are empty to prevent damage to the washer or clothing. Delicate items should be placed in a mesh laundry bag for added protection. Upon cycle completion, promptly remove laundry to prevent mildew growth and wrinkles.

Always lift laundry out carefully, checking for any remaining items at the bottom of the drum. A large drum capacity, as found in models like the 41072, allows for substantial loads, but still requires mindful loading and unloading practices.

Detergent Dispenser Guide

Your Kenmore Elite top load washer features a designated detergent dispenser designed for optimal detergent distribution. This ensures efficient cleaning and prevents residue buildup. The dispenser typically includes separate compartments for powdered detergent, liquid detergent, and fabric softener.

When using powdered detergent, fill the appropriate compartment to the indicated maximum fill line. Avoid overfilling, as this can cause clumping and inefficient dispensing. For liquid detergent, use the designated compartment and follow the manufacturer’s recommended dosage based on load size and soil level.

The fabric softener compartment should be filled only with liquid fabric softener; do not overfill. The washer will automatically release the fabric softener at the appropriate time during the cycle. Regularly clean the detergent dispenser to prevent buildup and ensure proper function.

Refer to the specific model’s diagram (41072, 41782, or 31633) for precise compartment locations and usage instructions, maximizing the cleaning power of your machine.

Wash Cycle Selection

The Kenmore Elite top load washer offers a variety of wash cycles to accommodate different fabric types and soil levels. Understanding these cycles ensures optimal cleaning and garment care. Common cycles include Normal/Regular, Delicates/Hand Wash, Heavy Duty, and Quick Wash.

The Normal/Regular cycle is ideal for everyday laundry items with moderate soil. Delicates/Hand Wash provides gentle cleaning for fragile fabrics like lingerie and silk. Heavy Duty tackles heavily soiled items such as work clothes and towels, utilizing increased agitation and longer wash times.

For lightly soiled items or when time is limited, the Quick Wash cycle offers a faster cleaning option. Additional cycles may include Bulky Items, Whites, and Colors. Always consult the garment care label before selecting a cycle. Proper cycle selection maximizes cleaning performance and extends the life of your clothes.

Normal/Regular Cycle

The Normal/Regular cycle on your Kenmore Elite top load washer is designed for everyday laundry, handling moderately soiled clothes with excellent results. This cycle utilizes a balanced combination of wash, rinse, and spin actions to effectively remove dirt and stains from typical loads.

Water temperature settings can be adjusted within the Normal/Regular cycle to suit your needs – hot for whites and heavily soiled items, warm for colors, and cold for delicates or to conserve energy. The cycle duration is typically around 45-60 minutes, providing a thorough clean without excessive wear and tear on fabrics.

For optimal performance, avoid overloading the washer. Ensure clothes are distributed evenly within the drum. This cycle is suitable for items like t-shirts, jeans, and everyday wear, delivering consistently clean results with minimal effort.

Delicates/Hand Wash Cycle

The Delicates/Hand Wash cycle is specifically engineered for your most fragile garments, offering a gentle cleaning experience. This cycle employs a slower wash and spin speed, minimizing agitation and reducing the risk of stretching, snagging, or damaging delicate fabrics like lingerie, silk, and lace.

Always use a mild detergent formulated for delicates when utilizing this cycle. Cold water is highly recommended to prevent shrinking or color fading. The cycle duration is extended compared to regular cycles, ensuring a thorough yet gentle clean.

For best results, place delicate items inside a mesh laundry bag for added protection. Avoid washing heavily soiled delicates in this cycle; pre-treating stains is advised. This cycle provides a safe and effective way to care for your most treasured and sensitive clothing items.

Heavy Duty Cycle

The Heavy Duty cycle is designed to tackle your toughest laundry challenges, effectively removing stubborn stains and deeply embedded dirt from heavily soiled items. This cycle utilizes a more vigorous wash action and a longer wash time, ensuring a powerful cleaning performance for items like work clothes, towels, and bedding.

For optimal results, use a heavy-duty detergent and consider pre-treating heavily stained areas. Hot water is recommended for maximizing cleaning power, but always check garment care labels for temperature restrictions. Avoid overloading the washer, as this can reduce the cycle’s effectiveness.

This cycle is ideal for durable fabrics that can withstand aggressive washing. While effective, remember that frequent use of the Heavy Duty cycle may cause increased wear and tear on your garments. Always sort laundry carefully to prevent color bleeding.

Quick Wash Cycle

The Quick Wash cycle offers a convenient solution for lightly soiled items that require a fast refresh. This cycle significantly reduces wash and rinse times, providing a complete wash in approximately 30 minutes – perfect for busy schedules or small loads. It’s an excellent choice for everyday items like t-shirts, underwear, and workout clothes.

While efficient, the Quick Wash cycle utilizes a gentler wash action and cooler water temperatures compared to other cycles. Therefore, it’s not recommended for heavily soiled items or fabrics requiring deep cleaning. Use a small amount of high-efficiency detergent to avoid excessive suds.

To maximize effectiveness, avoid overloading the washer during a Quick Wash. This ensures proper water circulation and detergent distribution. This cycle prioritizes speed and convenience, making it a valuable option for maintaining a consistent laundry routine.

Maintenance and Troubleshooting

Regular cleaning and prompt attention to error codes ensure optimal performance and longevity of your Kenmore Elite washer, preventing costly repairs.

Cleaning the Washer

Maintaining a clean washer is crucial for optimal performance and preventing odors. Regularly wipe down the exterior with a damp cloth and mild detergent. For the interior, run a dedicated washer cleaner cycle monthly, or utilize a solution of hot water and white vinegar.

Pay close attention to the detergent dispenser; residue buildup can hinder proper dispensing. Remove and rinse the dispenser drawers thoroughly, ensuring all compartments are free of clogs. Inspect the washer drum for any lingering debris after each wash, removing items like socks or coins.

Additionally, clean the washer’s lid and rubber gasket to prevent mildew growth. Leaving the lid ajar after use promotes ventilation and reduces moisture buildup. Consistent cleaning extends the life of your Kenmore Elite top load washer and ensures consistently fresh laundry results.

Common Error Codes and Solutions

Your Kenmore Elite washer utilizes error codes to diagnose issues. An “F01” code often indicates an imbalance during the spin cycle – redistribute the load and restart. “F02” suggests a water supply problem; check the inlet hoses for kinks or obstructions and ensure water is turned on.

If you encounter an “F03” error, it typically signals a drain issue. Inspect the drain hose for clogs and verify the drain pump is functioning correctly. A “LE” code denotes a lid switch problem; ensure the lid is fully closed during operation.

For less common codes, consult the full owner’s manual or the Kenmore support website. Always disconnect the power before attempting any repairs. If the error persists after troubleshooting, contacting a qualified appliance technician is recommended to prevent further damage.

Replacing the Water Inlet Filters

Regularly cleaning the water inlet filters is crucial for maintaining optimal washer performance. Begin by disconnecting the power and turning off the water supply to the washer. Locate the inlet hoses at the back of the machine – one for hot and one for cold water.

Carefully unscrew the hoses from the washer. You’ll find small mesh filters inside the hose connectors. Gently remove these filters using pliers or a small screwdriver. Rinse the filters thoroughly under running water to remove any sediment or debris.

Inspect the filters for damage and replace them if necessary. Reinstall the cleaned or new filters, securely reattach the hoses, and restore the water supply and power. This simple maintenance task can prevent water flow issues and extend the life of your Kenmore Elite washer.

Safety Precautions

Always prioritize safety when operating your Kenmore Elite washer. Disconnect power before maintenance, prevent damage by avoiding overloading, and keep children supervised.

Important Safety Instructions

To reduce the risk of fire, electric shock, or injury when using your Kenmore Elite top load washer, carefully follow these essential safety guidelines. Always ensure the washer is properly grounded. Never attempt to repair the appliance yourself; contact qualified service personnel for assistance.

Do not operate the washer if the power cord or plug is damaged. Avoid using extension cords. Keep the area around the washer clear and free from flammable materials.

Supervise children closely when they are near the washer. Do not allow them to play with the controls or climb inside the drum. Before cleaning or performing maintenance, disconnect the power supply.

Never mix bleach with other cleaning agents, as hazardous fumes may result. Always follow the detergent manufacturer’s instructions. Inspect hoses regularly for cracks or leaks, and replace them as needed.

This appliance is intended for household use only. Misuse can void the warranty and potentially cause harm.

Preventing Damage to the Washer

Protect your Kenmore Elite top load washer from potential damage by adhering to these preventative measures. Avoid overloading the washer, as this can strain the motor and components. Distribute laundry evenly within the drum to maintain balance during operation.

Only use High Efficiency (HE) detergents specifically designed for top load washers; standard detergents can create excessive suds and residue. Regularly clean the detergent dispenser to prevent clogs and buildup.

Inspect pockets for objects like coins, keys, or pens before loading laundry, as these can damage the washer’s internal parts. Do not wash items containing flammable substances.

Periodically check the water inlet hoses for kinks or obstructions. Ensure the washer is placed on a level surface to minimize vibration and noise. Avoid placing heavy objects on top of the washer.

Proper care and maintenance will extend the lifespan of your Kenmore Elite washer and ensure optimal performance.

manual for 2015 chrysler 200

Featuring detailed diagrams and step-by-step instructions, the 2015 Chrysler 200 service manual PDF is the ultimate resource for vehicle maintenance and repair.

Overview of the Vehicle

The 2015 Chrysler 200 represents a significant redesign for this mid-size sedan, offering a blend of style, technology, and performance. A comprehensive manual is crucial for owners seeking to understand and maintain this vehicle effectively. This model year introduced a more sophisticated interior and exterior design compared to its predecessors, aiming to compete more directly with established rivals in the segment.

Access to a detailed service manual, like the PDF versions available, provides invaluable assistance for both routine maintenance and more complex repairs. These manuals often include detailed diagrams, specifically like the 2015 Chrysler 200 A/T Circuit Diagram, aiding in electrical system troubleshooting. Understanding components, from headlight washer kits (SA200HWK) to chrome tow ball options (TZK001), is simplified with proper documentation.

Proper maintenance, guided by the manual, ensures longevity and optimal performance, covering everything from oil changes to suspension work.

Importance of a Manual for Maintenance

A dedicated manual for the 2015 Chrysler 200 is paramount for ensuring its reliable operation and longevity. These resources, such as the detailed service manual PDFs, provide crucial information beyond the standard owner’s guide, enabling owners to perform effective maintenance and repairs. Access to diagrams, like the A/T Circuit Diagram, is invaluable for diagnosing electrical issues and understanding complex systems.

Without a manual, identifying the correct oil types, coolant specifications, or transmission fluid can be challenging, potentially leading to damage. Haynes manuals offer essential information for servicing tasks. Proper maintenance, guided by the manual, extends the vehicle’s lifespan and maintains its value.

Understanding component specifics – from headlight washer kits to tow ball installations – becomes straightforward with detailed instructions. A manual empowers owners to proactively address issues and avoid costly repairs.

Engine Specifications & Maintenance

The 2015 Chrysler 200 manual details engine types (2.4L & 3.6L), recommended oil and coolant, and crucial flush intervals for optimal performance.

Engine Types Available (2.4L & 3.6L)

The 2015 Chrysler 200 offered drivers a choice between two powerful and efficient engine options. The standard engine was a 2.4-liter Tigershark MultiAir I4 engine, known for its fuel efficiency and responsive performance. This engine delivered a balance of power and economy, suitable for everyday driving needs. For those seeking more robust performance, a 3.6-liter Pentastar V6 engine was available.

This V6 engine provided significantly increased horsepower and torque, enhancing acceleration and overall driving experience. The manual for the 2015 Chrysler 200 provides detailed specifications for both engines, including horsepower, torque ratings, compression ratios, and firing orders. Understanding these specifications is crucial for proper maintenance and repair procedures. The manual also outlines specific maintenance schedules tailored to each engine type, ensuring longevity and optimal operation.

Recommended Oil Types & Capacities

Maintaining proper lubrication is vital for the longevity of your 2015 Chrysler 200’s engine. The service manual specifies the recommended oil types and capacities for both the 2.4L and 3.6L engine options. For optimal performance, a full synthetic oil meeting Chrysler Material Standard MS-6395 is highly recommended. This ensures superior protection against wear and tear, especially under demanding driving conditions.

The 2.4L engine typically requires approximately 5.1 quarts (4.8 liters) of oil with filter, while the 3.6L engine necessitates around 6.0 quarts (5.7 liters) with filter. Always consult the manual for precise figures, as slight variations may exist. Using the incorrect oil type or insufficient quantity can lead to engine damage. Regular oil changes, adhering to the intervals outlined in the manual, are crucial for maintaining engine health and preventing costly repairs.

Coolant Specifications & Flush Intervals

The 2015 Chrysler 200’s cooling system relies on a specific coolant formulation to prevent corrosion and maintain optimal engine temperature. The service manual dictates the use of a high-quality ethylene glycol-based coolant meeting Chrysler Material Standard MS-9785. Mixing different coolant types can cause chemical reactions, leading to system damage and reduced efficiency.

Regular coolant flushes are essential for removing contaminants and ensuring the cooling system operates effectively. The recommended flush interval is typically every 30,000 miles (48,000 kilometers) or every two years, whichever comes first. Ignoring this maintenance can result in overheating, radiator damage, and potential engine failure. Always refer to the manual for the precise coolant capacity and proper bleeding procedures after a flush to eliminate air pockets.

Transmission Information

The 2015 Chrysler 200 utilizes a sophisticated 9-speed automatic transmission; the service manual provides detailed information for fluid changes and troubleshooting.

Automatic Transmission Details (9-Speed)

The 2015 Chrysler 200 prominently features a highly advanced nine-speed automatic transmission, designed to optimize fuel efficiency and enhance driving performance. A comprehensive service manual is crucial for understanding its intricacies. This transmission employs a complex system of gears and electronic controls, demanding precise maintenance procedures.

Detailed schematics within the manual illustrate the internal components and their functions, aiding in accurate diagnosis and repair. The manual outlines the transmission’s operating principles, including shift patterns and adaptive learning capabilities. Proper understanding of these features is vital for resolving any performance issues. Furthermore, the manual provides specific torque specifications for all transmission fasteners, ensuring correct assembly and preventing damage. Accessing this information is paramount for any mechanic working on this vehicle.

Transmission Fluid Type & Change Intervals

Maintaining the correct transmission fluid level and condition is critical for the longevity of the 2015 Chrysler 200’s nine-speed automatic transmission. The service manual specifies the exact transmission fluid type required – typically a Mopar Vehicle Fluid MS-9602. Using an incorrect fluid can lead to severe transmission damage and void any warranty coverage.

The manual details the recommended transmission fluid change intervals, which vary depending on driving conditions. Under normal driving conditions, a fluid and filter change is generally recommended every 60,000 to 80,000 miles. However, for severe driving conditions, such as frequent towing or stop-and-go traffic, more frequent changes – around 30,000 to 40,000 miles – are advised. The manual provides a step-by-step procedure for fluid level checks and changes, ensuring proper execution.

Troubleshooting Common Transmission Issues

The 2015 Chrysler 200’s nine-speed automatic transmission, while advanced, can exhibit certain common issues. The service manual provides detailed troubleshooting guides for these problems. Slipping gears, harsh shifting, or delayed engagement are frequently reported. The manual outlines diagnostic procedures, including checking the transmission fluid level and condition, scanning for diagnostic trouble codes (DTCs), and performing specific tests to isolate the cause.

Common causes include low fluid levels, contaminated fluid, faulty solenoids, or internal transmission damage. The manual details how to interpret DTCs and provides specific repair procedures for each identified issue. It also includes wiring diagrams to assist in electrical troubleshooting. Ignoring these issues can lead to more extensive and costly repairs, so prompt diagnosis and attention are crucial, guided by the manual’s comprehensive instructions.

Electrical System & Diagrams

The 2015 Chrysler 200 manual offers a comprehensive A/T circuit diagram overview, battery specifications, and detailed fuse box locations for effective diagnostics.

2015 Chrysler 200 A/T Circuit Diagram Overview

The 2015 Chrysler 200’s automatic transmission (A/T) circuit diagrams are crucial for understanding the complex interplay of electrical components governing its operation. These diagrams, found within the comprehensive service manual, detail the wiring pathways, connector pinouts, and component locations essential for troubleshooting transmission-related issues.

Understanding these schematics allows technicians and experienced DIYers to accurately diagnose problems ranging from solenoid malfunctions to sensor failures. The diagrams illustrate the flow of signals between the transmission control module (TCM), various sensors (speed, temperature, input/output), and actuators (solenoids, torque converter clutch).

Proper interpretation of the A/T circuit diagrams requires familiarity with automotive electrical principles and the use of a multimeter for testing continuity and voltage. The manual provides a visual guide to identifying components and tracing circuits, ultimately enabling efficient and accurate repairs, minimizing downtime and ensuring optimal transmission performance.

Battery Specifications & Replacement

The 2015 Chrysler 200’s battery is a vital component of its electrical system, powering the starter, lights, and electronic accessories. The service manual details specific battery specifications, including group size, cold cranking amps (CCA), and reserve capacity, ensuring the correct replacement is selected. Typically, Group Size 35 is recommended.

Replacement procedures outlined in the manual emphasize safety precautions, such as disconnecting the negative terminal first to prevent short circuits. Step-by-step instructions guide users through removing the battery hold-down, disconnecting the cables, and installing the new battery.

Post-replacement, the manual stresses the importance of resetting electronic systems, as some modules may lose their programmed settings when power is interrupted. Proper battery installation and system reset are crucial for reliable starting and optimal performance of all electrical components within the 2015 Chrysler 200.

Fuse Box Locations & Diagrams

The 2015 Chrysler 200 incorporates multiple fuse box locations to protect its various electrical circuits. The service manual provides detailed diagrams illustrating the location of each fuse box – typically found within the passenger compartment and under the hood. These diagrams are essential for identifying the correct fuse associated with a specific component.

Each diagram clearly labels each fuse, specifying its amperage rating and the corresponding circuit it protects (e.g., radio, lights, power windows). The manual emphasizes the importance of using the correct amperage fuse when replacing a blown one, as using a higher amperage fuse can cause damage to the electrical system.

Troubleshooting electrical issues often begins with checking the fuses, and the manual’s diagrams simplify this process, enabling owners to quickly diagnose and resolve common electrical problems within their 2015 Chrysler 200.

Braking System

The manual details brake pad replacement, fluid type, bleeding procedures, and provides an overview of the ABS system for the 2015 Chrysler 200.

Brake Pad Replacement Guide

This guide provides a comprehensive, step-by-step procedure for safely and effectively replacing the brake pads on your 2015 Chrysler 200. Before beginning, ensure you have the correct replacement pads, brake cleaner, and necessary tools – including a jack, jack stands, and wrench set.

First, safely lift the vehicle and secure it with jack stands. Remove the wheel to access the brake caliper. Carefully detach the caliper from the rotor, noting the position of any clips or hardware. Remove the old brake pads, and thoroughly clean the caliper bracket with brake cleaner.

Install the new brake pads, ensuring they are properly seated. Reattach the caliper, and torque the bolts to the manufacturer’s specifications. Finally, pump the brake pedal several times to ensure proper engagement. Always test the brakes in a safe area after completing the replacement.

Brake Fluid Type & Bleeding Procedure

Maintaining the correct brake fluid is crucial for optimal braking performance in your 2015 Chrysler 200. The recommended brake fluid type is DOT 3 brake fluid; however, DOT 4 is also acceptable and offers a higher boiling point. Always refer to your vehicle’s owner’s manual for confirmation. Regularly check the fluid level and condition, replacing it as needed.

To bleed the brake system, start with the wheel furthest from the master cylinder. Connect a clear hose to the bleed screw and submerge the other end in a container of brake fluid. Have an assistant slowly pump the brake pedal several times, then hold it down. Open the bleed screw briefly, allowing fluid and air to escape.

Close the screw before the pedal reaches the floor. Repeat this process until only clean, bubble-free fluid emerges. Repeat for each wheel, ensuring the master cylinder reservoir doesn’t run dry.

ABS System Overview

The 2015 Chrysler 200’s Anti-lock Braking System (ABS) is a vital safety feature designed to prevent wheel lockup during hard braking, enhancing steering control and reducing stopping distances. The system utilizes wheel speed sensors to monitor individual wheel rotation. When impending lockup is detected, the ABS module rapidly modulates brake pressure to each wheel independently.

This modulation prevents the wheels from skidding, allowing the driver to maintain steering control. A warning light on the instrument panel illuminates when the ABS system detects a malfunction. Diagnostic trouble codes (DTCs) can be retrieved using a scan tool to pinpoint the source of the issue.

Common ABS components include the ABS module, wheel speed sensors, and the hydraulic control unit. Proper function relies on a clean and properly functioning system, free from debris or damage.

Suspension & Steering

The 2015 Chrysler 200’s suspension and steering systems require careful attention; detailed guides for shock and strut replacement are essential for proper vehicle handling.

Shock & Strut Replacement

Replacing the shocks and struts on your 2015 Chrysler 200 is a critical maintenance task impacting ride quality and vehicle safety. A comprehensive service manual provides detailed, step-by-step instructions, ensuring a successful and safe repair. Before beginning, always disconnect the negative battery cable to prevent accidental electrical issues.

The manual will guide you through safely supporting the vehicle, removing the old shocks and struts, and correctly installing the new components. Pay close attention to torque specifications for all fasteners, as improper tightening can lead to premature wear or failure. Diagrams within the manual clearly illustrate component locations and assembly procedures.

Furthermore, the manual emphasizes the importance of inspecting related components, such as sway bar links and bushings, during the replacement process. Addressing these issues simultaneously can prevent future suspension problems. Following the manual’s guidance ensures your 2015 Chrysler 200’s suspension system operates optimally, providing a comfortable and controlled driving experience.

Steering System Components

The 2015 Chrysler 200’s steering system comprises several key components, and a detailed service manual is essential for understanding their function and maintenance. These components include the steering rack, power steering pump, steering column, tie rod ends, and ball joints. The manual provides exploded views and diagrams illustrating the precise location and interaction of each part.

Proper maintenance, guided by the manual, ensures smooth and responsive steering. This includes checking power steering fluid levels and inspecting hoses for leaks or damage. The manual details procedures for inspecting and replacing worn tie rod ends and ball joints, crucial for maintaining steering precision and preventing alignment issues.

Furthermore, the manual outlines safety precautions when working on the steering system, emphasizing the importance of disconnecting the battery and properly supporting the vehicle. Accurate torque specifications for all fasteners are provided, guaranteeing safe and reliable operation of the 2015 Chrysler 200’s steering system.

Body & Interior

The manual details removal and replacement of interior components, headlight washer kit information, and options like the chrome tow ball and hitch (TZK001).

Headlight Washer Kit Information

The 2015 Chrysler 200 service manual provides comprehensive guidance regarding the headlight washer kit, identified as part number SA200HWK. This section details the proper installation procedure, ensuring optimal functionality and maintaining headlight clarity. Diagrams illustrate component placement and connection points, simplifying the process for both novice and experienced mechanics.

Furthermore, the manual outlines troubleshooting steps for common issues, such as nozzle misalignment or pump failure. It specifies the correct fluid type for the washer system and provides instructions for refilling the reservoir. Safety precautions are emphasized throughout, highlighting the importance of disconnecting the vehicle’s power source before commencing any electrical work related to the headlight washer system. Proper maintenance, as detailed in the manual, extends the lifespan of the kit and ensures continued visibility during inclement weather conditions.

Chrome Tow Ball & Hitch Options

The 2015 Chrysler 200 service manual details available chrome tow ball and hitch options, specifically referencing the TZK001 tow ball with hitch, designed for EU compatibility. Installation instructions are thoroughly documented, including torque specifications for all mounting hardware, ensuring a secure and reliable connection. Diagrams clearly illustrate the hitch receiver’s placement and the tow ball’s attachment points to the vehicle’s chassis.

The manual also addresses weight capacity limitations, emphasizing the importance of adhering to the vehicle’s maximum towing capacity to prevent damage and maintain safe operation. It provides guidance on selecting the appropriate hitch class based on the intended load. Furthermore, the manual includes information on wiring harness connections for trailer lights, ensuring proper functionality of brake lights, turn signals, and running lights. Regular inspection, as outlined in the manual, is crucial for identifying any signs of wear or corrosion.

Interior Component Removal & Replacement

The 2015 Chrysler 200 service manual provides detailed procedures for removing and replacing various interior components. It covers everything from dashboard trim pieces to seat assemblies, outlining the necessary tools and precautions to avoid damage. Step-by-step instructions, accompanied by clear diagrams, guide technicians through the process of disconnecting electrical connectors and releasing retaining clips.

Specific attention is given to components containing sensitive electronics, such as the infotainment system and climate control modules. The manual emphasizes the importance of disconnecting the battery before working on any electrical components. Torque specifications for reinstallation are provided to ensure proper fit and function. Furthermore, the manual details procedures for removing and replacing door panels, headliners, and carpeting, offering guidance on handling delicate materials and avoiding damage to underlying structures. Proper sequencing of removal and installation is crucial, as detailed within the manual.

overhead door rsx operator manual

Overhead Door RSX Operator Manual: A Comprehensive Guide

This comprehensive guide details the installation, operation, and maintenance of the Overhead Door RSX operator series, ensuring safe and efficient performance for rolling doors and grilles.

The Overhead Door RSX operator represents a significant advancement in commercial door and grille operation, designed for reliability and ease of use. This series caters to a wide range of applications, from standard rolling doors to fire-rated doors, offering adaptable solutions for diverse facility needs.

Understanding the RSX operator’s capabilities is crucial for installers, maintenance personnel, and end-users alike. This manual serves as a central resource, providing detailed instructions on everything from unpacking and installation to troubleshooting and parts replacement.

The RSX operator boasts state-of-the-art features, ensuring smooth, quiet, and dependable performance. Proper installation and adherence to safety guidelines, detailed within this manual, are paramount for maximizing the operator’s lifespan and ensuring operational safety.

Understanding the RSX Operator Series

The RSX operator series encompasses a range of models designed for various door types and operational demands. These operators are categorized by their mounting configurations – center mount and standard – and their suitability for different door sizes and weights.

Key to the RSX series is its robust construction and advanced control systems. The operator utilizes a sophisticated limit system that remains synchronized during manual operation, enhancing safety and control.

Furthermore, the RSX series is designed for easy integration with various access control systems and smart home technologies. Detailed technical specifications, including dimensions and electrical requirements, are provided to ensure compatibility and optimal performance. Understanding these nuances is vital for selecting the appropriate RSX model for a specific application.

Key Features and Benefits of the RSX Operator

The Overhead Door RSX operator boasts state-of-the-art performance features, delivering easy operation and superior functionality for commercial and industrial doors. Its standard-duty design ensures reliability and longevity, minimizing downtime and maintenance costs.

A significant benefit is the simplified setup process, aided by comprehensive manuals and readily available resources. The RSX series offers seamless integration with smart technologies, enhancing convenience and security.

Furthermore, the operator’s robust construction and advanced control systems contribute to increased safety and efficiency. Access to PDF manuals and dedicated support from Overhead Door Corporation ensures users can quickly resolve any issues and maximize the operator’s potential.

Safety Precautions and Warnings

Prioritize safety during installation and operation; this manual emphasizes the importance of following all guidelines to prevent injury and ensure proper functionality.

General Safety Guidelines

Always disconnect power before performing any maintenance or repairs on the RSX operator. Qualified personnel should handle all electrical connections and adjustments, adhering to local codes. Never operate the door if damaged or malfunctioning; immediate repair is crucial.

Ensure the area around the door is clear of obstructions and personnel during operation. Regularly inspect the door, operator, and safety devices – including limit switches and reversing mechanisms – for proper function.

Do not attempt modifications to the operator; this can compromise safety and void the warranty. Familiarize yourself with emergency operation procedures, and ensure all users understand safe operating practices. Proper training is essential for preventing accidents and maintaining a safe environment.

Specific Warnings for RSX Operator Installation

Improper installation can lead to serious injury or death. Ensure the mounting surface is structurally sound and capable of supporting the operator’s weight and dynamic loads. Strictly adhere to the provided installation manual and local building codes throughout the process.

Verify correct electrical voltage and wiring configurations before connecting power; incorrect wiring can damage the operator and create a fire hazard. Pay close attention to limit switch adjustments, ensuring they accurately reflect the door’s travel limits.

Never bypass or disable safety devices during installation or testing. Confirm the trolley and door connection are secure and properly aligned. Always test the reversing mechanism after installation to verify it functions correctly.

Emergency Operation Procedures

In the event of a power outage, the RSX operator can be manually disengaged to allow for door operation. Locate the manual release mechanism – typically a pull cord or chain – and follow the instructions detailed in the operator manual. Exercise caution as the door may move freely once disengaged.

If the door fails to operate normally, immediately disconnect the power supply to prevent further damage or injury. Inspect for obstructions or mechanical failures. Do not attempt to repair the operator yourself unless you are a qualified technician.

Familiarize yourself with the emergency procedures before operating the door. Keep the manual release mechanism accessible and clearly labeled. Contact Overhead Door Corporation support for assistance if you encounter any issues.

Installation Guide

Proper installation is crucial for safe operation. This section covers unpacking, mounting, wiring, limit switch adjustments, and connecting the trolley to the door.

Unpacking and Inspection

Upon receiving the RSX operator, carefully inspect the shipping container for any signs of damage during transit. Document any visible damage immediately with photographs and notify the carrier and Overhead Door Corporation. Once the packaging is opened, verify that all components listed in the parts list are present.

Carefully remove all packing materials and protective coverings from the operator and its components. Compare the received items against the included documentation to ensure completeness. Inspect each part for defects, such as cracks, dents, or missing hardware. Any discrepancies or damaged parts should be reported to Overhead Door Corporation support before proceeding with the installation. Retain the original packaging materials for potential returns or warranty claims.

Mounting the RSX Operator

Securely mounting the RSX operator is crucial for safe and reliable operation. Begin by selecting a structurally sound mounting surface capable of supporting the operator’s weight and anticipated loads. Utilize appropriate anchors and fasteners, ensuring they are compatible with the building’s construction.

Carefully position the operator according to the installation manual’s diagrams, maintaining proper alignment with the door’s travel path. Double-check all mounting points for secure attachment before proceeding. Verify that the trolley and door connection points are accessible and unobstructed. Proper mounting minimizes vibration and ensures optimal performance, extending the operator’s lifespan and enhancing safety.

Wiring and Electrical Connections

Prior to commencing any wiring, disconnect the main power supply to prevent electrical shock. Carefully follow the wiring diagrams provided in the installation manual, ensuring correct connections for power, control circuits, and safety devices. Utilize appropriately sized wiring and conduit, adhering to all local electrical codes and regulations.

Proper grounding is essential for operator safety and functionality. Verify secure connections to the grounding terminal. Double-check all connections for tightness and insulation integrity. Incorrect wiring can lead to operator malfunction, damage, or safety hazards. A qualified electrician should perform or supervise all electrical work.

Limit Switch Adjustment

Accurate limit switch adjustment is crucial for safe and reliable door operation. These switches define the fully open and fully closed positions of the door. Begin by loosening the limit switch mounting screws, allowing for adjustment. Carefully observe the door’s travel while making incremental adjustments to the limit switches.

Ensure the door stops precisely at the desired open and closed limits. The limit system must remain synchronized with the door during manual operation. Avoid over-travel, which can cause damage to the door or operator. Refer to the manual for specific adjustment procedures and recommended settings for your RSX model.

Trolley and Door Connection

Securely connecting the trolley to the door is paramount for safe operation. Verify the trolley is properly aligned with the door’s track and mounting points. Utilize the appropriate hardware, as specified in the installation manual, to establish a robust connection. Double-check all fasteners to ensure they are tightened to the manufacturer’s recommended torque specifications.

Inspect the connection regularly for wear or looseness. A compromised connection can lead to unexpected door movement or failure. The trolley must move smoothly along the track without binding or obstruction. Proper connection ensures efficient power transmission from the operator to the door, facilitating reliable operation.

Operation and Control

Understanding the RSX operator’s control systems is key; this section covers standard modes, control panel functions, and remote programming procedures for seamless operation.

Standard Operation Modes

The Overhead Door RSX operator offers several standard operation modes designed for diverse applications and safety requirements. Typically, these include a standard “Full Open/Close” mode, allowing complete door travel with a single activation. A “Manual” mode enables operation independent of the operator, useful for maintenance or emergencies – ensuring the limit system remains synchronized.

Furthermore, many RSX models feature a “Test” mode for verifying functionality during installation and troubleshooting. “Fire Door” operation, if applicable, prioritizes immediate opening upon fire alarm activation. Some advanced models may include timed operation or programmable sequences. Proper understanding of each mode, as detailed in the operator’s manual, is crucial for maximizing efficiency and ensuring safe, reliable performance of your rolling door or grille system.

Using the Control Panel

The RSX operator’s control panel serves as the central interface for managing door operation and system settings. Typically, it features illuminated buttons for “Open,” “Close,” and “Stop” functions, providing immediate control. Digital displays often indicate door position, error codes, and operational status.

Accessing advanced settings, like limit adjustments or timer programming, usually requires navigating a menu system via buttons or a keypad. The manual details specific button combinations and menu options. Regularly inspect the control panel for damage and ensure all labels are legible. Familiarity with the control panel’s functions, as outlined in the provided documentation, is essential for efficient operation and troubleshooting.

Remote Control Programming

Programming remote controls for your Overhead Door RSX operator typically involves a learning function initiated through the control panel. The process usually requires entering a programming mode, often by pressing and holding a designated button on the panel.

Once in programming mode, activate the remote control’s button – the operator should acknowledge the signal with a light or audible confirmation. Repeat this process for each additional remote. The manual provides specific instructions and troubleshooting tips if the remote fails to program. Ensure the remote’s battery is fresh for optimal performance. Always refer to the RSX operator manual for the exact programming sequence, as it can vary.

Maintenance and Troubleshooting

Regular maintenance, outlined in the RSX manual, is crucial for optimal performance. Troubleshooting common issues and identifying replacement parts are also covered extensively.

Regular Maintenance Schedule

To ensure the longevity and reliable operation of your Overhead Door RSX operator, a consistent maintenance schedule is paramount. Monthly inspections should include checking the operator’s travel limits, ensuring proper adjustment and functionality. Lubricate the chain and moving parts with a suitable lubricant, as detailed in the operator manual, to minimize friction and wear.

Quarterly, examine all electrical connections for tightness and signs of corrosion, addressing any issues promptly. Annually, a qualified technician should perform a comprehensive inspection, including a thorough check of the safety devices, spring tension, and overall mechanical condition. Following this schedule, as outlined in the RSX manual, will help prevent unexpected downtime and maintain peak performance, contributing to a safer and more efficient operation of your rolling door system.

Troubleshooting Common Issues

When encountering operational problems with your Overhead Door RSX operator, begin with basic checks. If the door doesn’t respond, verify the power supply and check for tripped circuit breakers. A door reversing unexpectedly may indicate limit switch adjustments are needed, referencing the manual for precise settings. Unusual noises often signal lubrication requirements or worn components.

If the remote control isn’t functioning, replace the battery or reprogram it following the manual’s instructions. For more complex issues, consult the troubleshooting section of the RSX operator manual or contact Overhead Door Corporation support. Always prioritize safety and disconnect power before attempting any repairs beyond basic checks.

Identifying and Replacing Parts

Accurate identification of RSX operator parts is crucial for successful replacements. The operator manual provides detailed exploded views and part numbers for all components, from the trolley and chain to the control panel and limit switches. When ordering replacements, always verify compatibility with your specific RSX model.

Prioritize safety by disconnecting power before any disassembly. Replacement procedures vary depending on the part; the manual offers step-by-step instructions. For specialized components or if unsure, consult a qualified technician. Using genuine Overhead Door replacement parts ensures optimal performance and maintains warranty validity. Proper installation is key to preventing future issues.

Technical Specifications

This section outlines the RSX operator’s dimensions, electrical requirements, and door compatibility details, providing essential data for installation and system integration.

RSX Operator Dimensions

Understanding the physical dimensions of the RSX operator is crucial for proper installation and ensuring adequate space within the facility. These dimensions vary slightly depending on the specific model and mounting configuration – center mount versus standard. Key measurements include the overall length, width, and height of the operator unit itself.

Furthermore, consider the trolley dimensions and required clearances for smooth door travel. Detailed dimensional drawings are available within the full RSX operator manual, accessible as a PDF online through Overhead Door Corporation’s resources. Accurate measurements prevent interference with structural elements and guarantee optimal performance. Always refer to the specific model’s documentation for precise specifications.

Electrical Requirements

Proper electrical supply is paramount for safe and reliable RSX operator function. The RSX operator typically requires a dedicated electrical circuit, with specific voltage and amperage requirements detailed in the installation manual. Commonly, this involves a 120V or 240V single-phase power source, though variations exist based on the operator’s horsepower and features.

Always consult the manual for the exact electrical specifications of your specific RSX model. Ensure the wiring meets local electrical codes and is performed by a qualified electrician. Proper grounding is essential for safety. Failure to adhere to these requirements can result in operator malfunction, damage, or even electrical hazards.

Door Compatibility

The Overhead Door RSX operator series is designed for compatibility with a wide range of rolling doors and grilles, but verifying suitability is crucial before installation. Factors influencing compatibility include door weight, door height, door width, and door type – whether it’s a rolling steel door, a rolling fire door, or a security grille.

Refer to the RSX operator’s specifications and the door manufacturer’s guidelines to ensure a proper match. The operator’s horsepower must be adequate for the door’s weight and size. Incorrectly sized operators can lead to performance issues or safety hazards. Confirming compatibility prevents damage and ensures optimal operation.

Downloading RSX Manuals and Resources

Access essential RSX operator manuals and support materials online as PDF files, directly from the Overhead Door Corporation website for easy download and reference.

Accessing PDF Manuals Online

Locating and downloading the correct PDF manual for your Overhead Door RSX operator is straightforward. The Overhead Door Corporation provides a comprehensive online resource library. Users can find operator manuals, installation guides, parts lists, and troubleshooting documentation readily available for download.

These digital resources ensure you have immediate access to critical information, eliminating the need for physical copies. Specifically, you can find manuals for RSX fire door operators and center mount installations. The online platform allows for quick searches based on model number or operator type, streamlining the process.

Ensure you select the manual that corresponds precisely to your RSX operator model to guarantee accurate instructions and safety guidelines. Regularly check for updated versions to benefit from the latest revisions and improvements.

Overhead Door Corporation Support

Overhead Door Corporation offers extensive support resources for RSX operator owners and technicians. Beyond readily available PDF manuals, their customer service team provides expert assistance with installation, operation, and troubleshooting. Contacting support ensures you receive tailored guidance specific to your operator model and application.

The corporation’s support network includes authorized distributors and trained service professionals, guaranteeing access to qualified expertise in your area. These professionals can perform maintenance, repairs, and safety inspections, maximizing the lifespan and reliability of your RSX operator.

Don’t hesitate to reach out to Overhead Door Corporation for assistance with any questions or concerns. Their commitment to customer satisfaction ensures a positive experience with their products and services.

Finding Additional Documentation

Beyond the core RSX operator manual, supplemental documentation can enhance your understanding and maintenance capabilities. Explore Overhead Door Corporation’s website for detailed application guides, wiring diagrams, and parts lists specific to your model. These resources often provide visual aids and step-by-step instructions for complex procedures.

Industry forums and online communities dedicated to door and gate operators can also offer valuable insights. Experienced technicians and users frequently share troubleshooting tips, best practices, and solutions to common issues.

Remember to always prioritize official Overhead Door documentation for accurate and reliable information. Utilizing a combination of resources ensures a comprehensive understanding of your RSX operator’s functionality and maintenance requirements.

bissell spot clean pro user manual

Bissell SpotClean Pro User Manual: A Comprehensive Guide

Welcome! This comprehensive guide details the Bissell SpotClean Pro, assisting you in achieving a deeper clean for carpets, rugs, and upholstery.

Explore features, safety precautions, and maintenance tips to maximize your cleaning experience with this powerful portable carpet cleaner.

Bissell supports the Pet Foundation, and purchases aid their mission – enjoy a clean home while contributing to a worthy cause!

Congratulations on selecting the Bissell SpotClean Pro, a powerful and versatile portable carpet cleaning solution designed for tackling everyday messes and stubborn stains throughout your home. This innovative device offers a convenient way to deep clean carpets, rugs, upholstery, and even hard surfaces, providing a fresh and revitalized living space.

The SpotClean Pro distinguishes itself with its compact design and targeted cleaning capabilities, making it ideal for spot treatments, pet accidents, and quick cleanups. Bissell, a family-owned brand, prioritizes delivering effective cleaning solutions, and this model embodies that commitment.

This user manual will guide you through the setup, operation, and maintenance of your SpotClean Pro, ensuring optimal performance and longevity. Remember to read all instructions carefully before use to maximize its cleaning potential and enjoy a consistently cleaner home.

Unboxing and Component Identification

Upon opening your Bissell SpotClean Pro box, carefully verify that all components are present. You should find the SpotClean Pro machine itself, a specialized hose designed for targeted cleaning, and a variety of tool attachments for diverse surfaces and stain types.

Inspect the included tank – this is where your cleaning solution and water mixture will reside. Locate the power cord and ensure it’s in good condition. Also, confirm the presence of a sample size of Bissell Spot & Stain cleaner formula to get you started.

Refer to the included quick start guide for a visual representation of each component. Familiarizing yourself with these parts before assembly will streamline the setup process and ensure proper operation of your new cleaning appliance.

Safety Precautions and Warnings

Important Safety Instructions: Before operating your Bissell SpotClean Pro, carefully read all instructions to minimize risks. This appliance is for indoor use only and should not be used on flammable materials. Always disconnect the cleaner from the power outlet before performing maintenance or troubleshooting.

Never operate the device with a damaged cord or plug. Avoid pulling or carrying the cleaner by the cord. Do not immerse the machine in water. Keep children and pets away during operation;

Use only Bissell cleaning solutions to prevent damage and maintain optimal performance. Failure to follow these warnings could result in electric shock, injury, or damage to the appliance.

Setting Up Your SpotClean Pro

Initial Setup: Begin by carefully removing your Bissell SpotClean Pro from the packaging. Locate the clean and dirty water tanks; the dirty tank is typically translucent. Fill the clean water tank with warm tap water and your preferred Bissell cleaning solution, following the solution’s dilution instructions.

Securely attach the hose to the designated port on the unit. Ensure a snug fit to prevent leaks during operation. Select the appropriate cleaning tool for your surface – the tough stain tool is ideal for stubborn messes, while the standard tool suits general cleaning.

Plug the SpotClean Pro into a grounded electrical outlet, and you’re ready to begin!

Understanding the Controls and Features

Key Controls: The Power Button initiates operation; a single press turns the unit on, and another turns it off. The Spray Trigger, located on the handle, dispenses cleaning solution when depressed, activating the spray function. Understanding these is crucial for effective cleaning.

Hose and Attachments: The flexible hose extends your reach, while various Tool Attachments cater to different surfaces and stain types. The SpotClean Pro boasts specialized tools for tackling pet stains and general messes.

Familiarize yourself with these features to optimize your cleaning process and achieve the best results. Always read all instructions before use!

Power Button and Operation

Initiating Operation: The Power Button on your Bissell SpotClean Pro is straightforward – a single press activates the machine, indicated by a power light. Pressing the button again immediately shuts the unit off. Ensure the tank is properly installed and contains clean water and solution before powering on.

Operational Considerations: Always unplug the cleaner when not in use and before performing any maintenance. Avoid continuous operation for extended periods to prevent overheating. The power button’s simplicity ensures easy start and stop functionality during cleaning sessions.

Read all instructions before using your cleaner!

Spray Trigger and Solution Dispensing

Activating Spray: The Spray Trigger, located on the handle, controls the dispensing of cleaning solution. Pulling the trigger releases a targeted spray onto the stained area, initiating the cleaning process. The trigger requires consistent pressure for continuous spraying.

Solution Control: The SpotClean Pro mixes water and cleaning solution automatically. Ensure you’re using a BISSELL Spot & Stain Cleaner formula for optimal results. Avoid using excessive solution, as it can leave residue. Proper solution dispensing is key to effective stain removal.

Keep plenty of genuine BISSELL cleaning formula available!

Hose and Tool Attachments

Versatile Reach: The Hose extends the cleaning reach of your SpotClean Pro, allowing access to stairs, upholstery, and hard-to-reach areas. It connects securely to the main unit, providing flexibility during cleaning.

Tool Variety: Included Tool Attachments enhance cleaning capabilities. These tools tackle specific messes – a tough stain tool for stubborn spots, and a specialized pet stain tool for pet accidents. Ensure proper attachment for optimal performance.

Explore available accessories to further customize your cleaning experience. Shop for products and accessories directly from BISSELL for guaranteed compatibility!

Using the Bissell SpotClean Pro for Basic Cleaning

Quick Spot Treatment: For everyday spills and messes, the SpotClean Pro excels. Fill the clean tank with appropriate BISSELL cleaning solution, and position the tool over the stain;

Trigger Activation: Activate the Spray Trigger to dispense cleaning solution directly onto the affected area. Utilize the Power Button to initiate suction, lifting away dirt and liquid.

Multiple Passes: Perform several passes over the stain, observing the water lifting. Continue until the area appears clean. Remember to read all instructions before using your cleaner!

Deep Cleaning Carpets and Rugs

Pre-Treatment is Key: For heavily soiled carpets and rugs, pre-treating stubborn stains is recommended. Apply BISSELL Spot & Stain cleaner and allow it to dwell for a few minutes.

Slow and Steady: Employ slow, overlapping passes with the SpotClean Pro’s tool attachment. This ensures thorough cleaning and optimal dirt extraction. Focus on high-traffic areas for best results.

Dual Tank System: The SpotClean Pro’s dual tank system keeps clean and dirty water separate, preventing re-soiling. Regularly check the dirty water tank and empty as needed. Live in the moment, not the mess!

Stain-Specific Cleaning Techniques

Pet Accidents: Utilize a specialized pet stain formula. Blot up excess liquid, then saturate the area with cleaner. Allow dwell time, then extract with the hose attachment. Repeat if necessary for odor elimination.

Red Wine: Act quickly! Blot immediately, avoiding rubbing. Apply a red wine stain remover, let sit, and extract. Multiple passes may be needed to fully lift the stain.

Coffee & Food Spills: For fresh spills, blot and apply a general-purpose cleaning solution. For set-in stains, pre-treat and use the brush attachment for agitation before extracting.

Pet Stain Removal

Addressing pet messes requires a targeted approach. Begin by thoroughly blotting up any excess liquid with a clean cloth, avoiding any rubbing motion that could spread the stain. Next, select a BISSELL formula specifically designed for pet stains and odors.

Saturate the affected area, ensuring the solution penetrates deep into the carpet fibers. Allow a dwell time of 5-10 minutes for the formula to break down the stain and neutralize odors.

Utilize the hose attachment and carefully extract the solution, observing the lifted stain. Repeat the process as needed until the area is clean and odor-free.

Red Wine Stain Removal

Act quickly! Red wine stains require immediate attention for optimal results. Begin by blotting up as much excess wine as possible with a clean, absorbent cloth, working from the outside in to prevent spreading.

Apply a BISSELL stain-fighting formula directly onto the affected area, ensuring thorough saturation. Allow the solution to dwell for 3-5 minutes, enabling it to break down the wine’s pigments.

Employ the SpotClean Pro’s spray trigger and suction power to extract the wine and cleaning solution. Repeat this process several times, using fresh solution each time, until the stain is visibly diminished or removed.

Coffee and Food Spill Cleanup

Address spills promptly to prevent staining and lingering odors. For coffee or food spills, initially scrape away any solid residue with a dull knife or spoon, being careful not to spread the mess further into the fibers.

Utilize the SpotClean Pro’s hose and appropriate tool attachment to target the spill area directly. Apply a BISSELL cleaning solution formulated for general stain removal, saturating the affected area.

Activate the spray trigger and suction to lift the spill and solution. Repeat the process, alternating between spraying and extracting, until the area appears clean and dry. Consider a second pass with clean water for residue removal.

Maintaining Your SpotClean Pro

Regular maintenance ensures optimal performance and extends the life of your Bissell SpotClean Pro. After each use, clean the tank thoroughly with warm water and a mild detergent, rinsing completely to remove any remaining solution.

Inspect the hose for blockages and flush with water if necessary. Periodically replace the filter – a clogged filter reduces suction power. Refer to the manual for recommended replacement intervals.

Proper storage is crucial; ensure the tank is empty and dry before storing in a cool, dry place. Avoid wrapping the cord tightly to prevent damage. Consistent care keeps your SpotClean Pro ready for any mess!

Cleaning the Tank and Hose

Maintaining a clean tank is vital for preventing odors and ensuring optimal cleaning performance. After each use, detach the tank and empty any remaining solution. Rinse thoroughly with warm water, ensuring no residue remains.

For deeper cleaning, use a mild detergent and allow the tank to air dry completely before reattaching. Inspect the hose for blockages; detach it and flush with water to remove any debris.

A blocked hose reduces suction. Regularly cleaning both the tank and hose prevents build-up and keeps your Bissell SpotClean Pro functioning efficiently, delivering powerful cleaning every time.

Filter Replacement

Regular filter replacement is crucial for maintaining suction power and preventing dust and allergens from recirculating. The Bissell SpotClean Pro utilizes a filter that requires periodic changes, depending on usage frequency.

Check the filter after each use and replace it when visibly dirty or if suction diminishes. A clogged filter strains the motor and reduces cleaning effectiveness. To replace, locate the filter compartment (refer to your model’s diagram).

Remove the old filter and insert a new, genuine BISSELL replacement filter. Ensure a secure fit. Replacing the filter ensures optimal performance and extends the life of your SpotClean Pro.

Storage Instructions

Proper storage extends the life of your Bissell SpotClean Pro. Before storing, ensure the tank is completely empty and clean to prevent mold or mildew growth. Remove any remaining solution from the hose and attachments.

Allow all components to dry thoroughly before storing. Wrap the power cord loosely around the cord wrap feature to avoid damage. Store the SpotClean Pro in a cool, dry place, away from direct sunlight and extreme temperatures.

Keep the unit upright to prevent any residual water from potentially damaging internal components. Secure the hose and tools with the provided clips or storage features.

Troubleshooting Common Issues

If your SpotClean Pro isn’t turning on, check the power cord connection and ensure the outlet is functioning. For reduced suction, inspect the tank for fullness and clean the filter – a clogged filter is a frequent cause.

If the spray trigger isn’t dispensing solution, verify the tank has sufficient cleaning fluid and the spray nozzle isn’t blocked. Unusual noises may indicate a foreign object in the hose; disconnect and inspect.

If stains persist, try a different Bissell cleaning formula or repeat the cleaning process. Always refer to the full user manual for detailed guidance and safety information.

Bissell Cleaning Solutions Compatibility

To maintain your Bissell SpotClean Pro’s performance and warranty, using compatible cleaning solutions is crucial. Bissell recommends its own line of Spot & Stain formulas, specifically designed for portable carpet cleaners like this model.

Avoid using soaps, detergents, or abrasive cleaners, as these can damage internal components and void your warranty. While some multi-purpose cleaners may seem suitable, they often leave residue or cause foaming issues.

Always check the solution label to ensure it’s safe for carpet and upholstery. Bissell offers specialized formulas for pet stains, red wine, and general cleaning – choose the best option for your needs!

Warranty Information and Customer Support

Your Bissell SpotClean Pro is covered by a limited warranty against defects in materials and workmanship. The warranty period typically lasts for one year from the date of purchase, but please retain your proof of purchase for verification.

The warranty doesn’t cover damage from misuse, abuse, or unauthorized repairs. For complete warranty details, refer to the separate warranty document included with your product.

For customer support, visit the Bissell website or contact their helpline. They offer troubleshooting assistance, replacement parts, and warranty claim processing. Bissell prioritizes customer satisfaction and provides resources to ensure a positive cleaning experience.

Available Accessories and Where to Purchase

Enhance your Bissell SpotClean Pro’s versatility with a range of available accessories! These include specialized cleaning tools, extra tanks, and extended hoses for reaching difficult areas. Bissell offers formulas specifically designed for pet stains, tough messes, and general carpet cleaning.

You can purchase these accessories directly from the Bissell website, major retailers like Amazon, Walmart, and Target, and authorized Bissell dealers. Always ensure you’re buying genuine Bissell parts to maintain your cleaner’s performance and warranty validity.

Explore Bissell’s online store for exclusive bundles and promotions on accessories, maximizing your cleaning power!

rogue clock manual pdf

Rogue Clock Manual PDF: A Comprehensive Guide

This comprehensive guide unlocks the full potential of your Rogue Clock, streamlining workflows and boosting productivity. Keep this manual readily available for future reference, ensuring optimal performance.

Welcome to the instructions for your newly acquired Rogue Clock Manual! This complete guide aims to help you become an expert user, providing detailed information.

Understanding the Rogue Clock

Delving into the Rogue Clock’s core functionality is essential for maximizing its benefits. This section provides a foundational understanding, preparing you to navigate its features effectively. The manual details how the clock operates, its intended purpose, and its unique capabilities.

Become an expert user through this detailed exploration, unlocking the full potential of your new device. This guide offers a comprehensive overview, ensuring seamless integration into your daily routines and workflows.

What is a Rogue Clock?

A Rogue Clock is a device designed to streamline workflows and enhance productivity. This manual serves as your guide to understanding its purpose and capabilities.

Defining Rogue Clocks and Their Purpose

Rogue Clocks represent a novel approach to time management, offering enhanced functionality beyond traditional timekeeping devices. They are engineered to optimize operational efficiency, providing users with precise synchronization and customizable settings. This manual details how to leverage these features for maximum productivity.

Essentially, a Rogue Clock aims to become an integral component of your workflow, facilitating seamless integration and improved time awareness. Understanding its purpose is key to unlocking its full potential.

Accessing the Rogue Clock Manual PDF

Locate the complete Rogue Clock Manual in PDF format through official download sources. Ensure secure access and avoid third-party repositories for optimal safety.

Official Download Sources

Access the authentic Rogue Clock Manual PDF directly from the manufacturer’s official website. This guarantees a secure, virus-free download and the most up-to-date version. Look for a dedicated “Support” or “Downloads” section on their webpage.

Alternatively, check the product registration portal if you previously registered your Rogue Clock. Often, manuals are available within your account dashboard. Prioritize these official channels to avoid potentially harmful or outdated files found elsewhere online, ensuring optimal functionality and security.

Third-Party Repositories and Risks

While numerous websites offer Rogue Clock Manual PDFs, exercising extreme caution is crucial. These third-party repositories often harbor outdated, incomplete, or even malicious files. Downloading from unofficial sources poses significant security risks, including viruses and malware infections.

Always scan downloaded files with a reputable antivirus program. Verify the file’s integrity and source before opening it. Prioritize official download sources to safeguard your system and ensure you receive a genuine, safe manual for your Rogue Clock.

Key Features & Functionality

Explore the Rogue Clock’s core capabilities, including precise time synchronization, an intuitive user interface, and extensive configuration options for personalized operation and control.

Time Synchronization Protocols

The Rogue Clock utilizes several protocols to maintain accurate timekeeping. Network Time Protocol (NTP) is a primary method, synchronizing with reliable time servers globally. Additionally, it supports SNTP for simpler network environments.

Precision is ensured through continuous adjustments, minimizing drift and maintaining consistency. Users can configure preferred servers and synchronization intervals within the settings menu, optimizing performance for their specific network conditions. Robust error handling ensures reliable operation even with intermittent connectivity.

User Interface Overview

The Rogue Clock features an intuitive interface designed for ease of use. A central display showcases the current time and date, with clear visibility. Navigation is streamlined through a menu system, accessible via dedicated buttons or touchscreen controls.

Key sections include time settings, network configuration, and user profiles. Visual cues and tooltips provide guidance, ensuring a smooth user experience. Customization options allow users to personalize the display and interface to their preferences.

Configuration Options

The Rogue Clock offers extensive configuration options to tailor its functionality. Users can adjust time synchronization protocols, selecting from NTP, SNTP, or manual settings. Network settings allow for IP address assignment, gateway configuration, and DNS server specification.

Advanced options include user profile management, alert customization, and display preferences. These settings ensure the clock integrates seamlessly into any environment, providing a personalized and efficient timekeeping solution.

Troubleshooting Common Issues

This section details solutions for frequent problems, including incorrect time displays, connectivity failures, and software glitches. Follow these steps to quickly resolve issues and restore optimal clock performance.

Clock Not Displaying Correct Time

If your Rogue Clock shows an inaccurate time, first verify the correct time zone setting within the configuration menu. Ensure network synchronization is enabled, allowing the clock to automatically adjust via NTP servers. Manually setting the time is also an option, but automatic synchronization is recommended for consistent accuracy.

Check for potential interference from other devices or obstructions affecting the signal. Restarting the clock can often resolve temporary synchronization issues. Consult the advanced settings for detailed time adjustment options.

Connectivity Problems

Experiencing connectivity issues with your Rogue Clock? First, confirm your network connection is stable and functioning correctly. Verify the clock is within range of your Wi-Fi router or network access point. Double-check the entered network password for accuracy within the configuration settings.

Restarting both the clock and your router can often resolve temporary network glitches. Consult the network configuration details in the manual for advanced troubleshooting steps and IP address settings.

Software Glitches & Error Messages

Encountering unexpected software glitches or error messages? Note the specific error code displayed for accurate troubleshooting. Attempt a simple restart of the Rogue Clock; this often resolves minor software conflicts. Refer to the manual’s troubleshooting section for explanations of common error messages and suggested solutions.

Ensure the firmware is up-to-date, as updates frequently address known bugs and improve stability. If problems persist, consider a factory reset (refer to the manual for instructions) as a last resort.

Advanced Settings & Customization

Unlock personalized control with detailed network configurations, user profile management, and customizable alert settings. Tailor the Rogue Clock to your specific needs and preferences for optimal functionality.

Network Configuration Details

Configure network settings for seamless time synchronization and remote access. Access the settings menu to input your network’s IP address, subnet mask, and gateway information. Ensure a stable connection by verifying DNS server addresses.

Explore advanced options like static IP assignment or DHCP reservation for consistent connectivity. Troubleshoot connection issues by checking firewall settings and network permissions. Secure your network by enabling encryption protocols for data transmission.

User Profile Management

Create personalized user profiles with unique access levels and preferences. Assign roles – administrator, operator, or viewer – to control functionality. Customize display settings, including time zones, date formats, and visual themes.

Manage user permissions to restrict access to sensitive configuration options. Implement password protection and enforce strong password policies for enhanced security. Audit user activity to track changes and maintain accountability.

Alert & Notification Settings

Configure customizable alerts for critical events, such as time synchronization failures or network connectivity issues. Set up email or SMS notifications to receive real-time updates. Define alert thresholds to trigger notifications based on specific criteria.

Prioritize alerts based on severity levels – critical, warning, or informational. Customize notification messages to provide clear and concise information. Enable or disable notifications based on user preferences and operational requirements.

Security Considerations

Protect your Rogue Clock with robust password protection and access control measures. Ensure data encryption safeguards sensitive information, maintaining privacy and integrity. Regularly apply firmware updates and security patches.

Password Protection & Access Control

Establishing strong password protocols is paramount for securing your Rogue Clock and its associated data. Utilize complex, unique passwords, incorporating a mix of uppercase and lowercase letters, numbers, and symbols. Implement user-specific access levels, granting permissions based on roles and responsibilities.

Regularly audit user accounts and disable those no longer required. Consider enabling multi-factor authentication for an added layer of security, protecting against unauthorized access. Document all security procedures and train personnel accordingly, fostering a security-conscious environment.

Data Encryption & Privacy

Protecting sensitive data is a core function of the Rogue Clock system. Employ robust encryption methods, both in transit and at rest, to safeguard information from unauthorized access. Understand and comply with relevant data privacy regulations, such as GDPR or CCPA, ensuring responsible data handling.

Implement data anonymization techniques where possible, minimizing the risk of identifying individuals. Regularly review and update privacy policies, maintaining transparency with users. Conduct privacy impact assessments to identify and mitigate potential risks.

Firmware Updates & Security Patches

Regular firmware updates are crucial for maintaining the Rogue Clock’s security and functionality. Enable automatic updates whenever possible to receive critical security patches promptly. Always download updates from official sources to avoid malware or compromised firmware.

Review release notes carefully before installing updates, understanding the changes and potential impacts. Establish a testing procedure for updates before widespread deployment. Maintain a rollback plan in case an update causes unforeseen issues.

Rogue Clock Manual PDF: Section Breakdown

This manual is structured for easy navigation, covering introduction, operational procedures, and maintenance. Detailed sections guide users from initial setup to advanced customization and troubleshooting.

Welcome to the Rogue Clock experience! This section provides a foundational understanding of your new device. Begin with unpacking and verifying all components are present, then proceed to initial power-up and basic configuration.

Familiarize yourself with the clock’s physical features and the user interface. This guide will walk you through the essential steps to establish a stable connection and synchronize time accurately. Successfully completing these initial steps will unlock the full potential of your Rogue Clock.

Operational Procedures

This section details the standard operating procedures for your Rogue Clock. Learn how to navigate the user interface efficiently, adjusting settings and monitoring performance. Mastering these procedures ensures reliable timekeeping and optimal functionality.

Explore time synchronization protocols and understand how to troubleshoot common issues. Regularly review these procedures to maintain peak performance and adapt to evolving needs. Proper operation guarantees a seamless and productive experience with your Rogue Clock.

Maintenance & Care

To ensure longevity and consistent performance, adhere to these maintenance guidelines. Regularly clean the device with a soft, dry cloth, avoiding harsh chemicals. Periodically check for firmware updates to benefit from the latest security patches and enhancements.

Proper care prevents potential issues and maintains accuracy. Avoid exposing the Rogue Clock to extreme temperatures or humidity. Following these simple steps will safeguard your investment and guarantee years of reliable operation.

Frequently Asked Questions (FAQ)

Find answers to common user queries regarding setup, troubleshooting, and advanced features. Access technical support information for personalized assistance and detailed guidance.

Common User Queries

Users frequently ask about initial setup procedures, particularly network configuration and time synchronization protocols. Many inquire about resolving connectivity issues and understanding error messages displayed on the interface. Others seek clarification on advanced settings, user profile management, and alert customization options.

Questions also arise regarding firmware updates, security patches, and data encryption methods. Finally, users often want to know where to find the latest version of the manual.

Technical Support Information

For immediate assistance, please visit our online community forums, brimming with user-generated solutions and expert advice. Alternatively, you can access our dedicated support portal, featuring a comprehensive knowledge base and troubleshooting guides. Direct support is available via email at support@rogueclock.com, with a typical response time of 24-48 hours.

Phone support is offered during business hours; details are on our website. Please have your Rogue Clock serial number ready.

Rogue Clock Manual PDF: Version History

Track updates and changes meticulously within this document. Identifying the latest version ensures you have the most current information for optimal Rogue Clock functionality.

Regular updates enhance performance and security.

Tracking Updates & Changes

Maintaining a detailed record of revisions is crucial for understanding Rogue Clock’s evolution. Each version incorporates improvements, bug fixes, and new features, enhancing overall performance and user experience.

This section outlines significant modifications, including date stamps and concise descriptions of alterations. Referencing this history allows users to pinpoint specific changes and troubleshoot potential compatibility issues. Regularly reviewing these updates ensures optimal system functionality.

Identifying the Latest Version

Determining the current version of your Rogue Clock Manual PDF is essential for accessing the most accurate and up-to-date information. Check the document properties, typically found under the “File” menu, for the version number and date of last modification.

Comparing this information with the version history detailed previously ensures you’re utilizing the latest resources. Always prioritize the newest version to benefit from all enhancements and resolved issues, maximizing your Rogue Clock experience.

Legal Information & Warranty

This manual outlines copyright, licensing, and warranty terms for your Rogue Clock. Review these details carefully to understand your rights and responsibilities as a user.

Copyright & Licensing

The Rogue Clock Manual PDF is protected by copyright laws, owned exclusively by the manufacturer. Distribution or reproduction, in whole or part, without written permission is strictly prohibited. Licensing terms grant users the right to utilize the manual for personal, non-commercial purposes related to operating the Rogue Clock.

Any unauthorized modification or commercial exploitation will be pursued legally. Users acknowledge these terms upon accessing the manual, ensuring respect for intellectual property rights.

Warranty Terms & Conditions

This Rogue Clock Manual PDF is accompanied by a limited warranty, covering defects in materials and workmanship for one year from the date of purchase. The warranty excludes damage resulting from misuse, accidents, or unauthorized modifications. To claim warranty service, provide proof of purchase and a detailed description of the issue.

The manufacturer reserves the right to repair or replace the defective product. This warranty is non-transferable and represents the full extent of our liability.

Community Forums & Support

Connect with fellow users on our online discussion boards for tips, troubleshooting, and shared experiences regarding the Rogue Clock Manual PDF. Access user groups and resources for enhanced support!

Online Discussion Boards

Engage with a vibrant community of Rogue Clock users on our dedicated online forums! Share your experiences, ask questions, and find solutions to common issues related to the manual PDF.

Participate in focused discussions, exchange tips and tricks, and contribute to a growing knowledge base. Access expert advice from experienced users and our support team. Stay updated on the latest news, updates, and announcements concerning the Rogue Clock and its documentation.

Find valuable resources, including FAQs, tutorials, and troubleshooting guides, all within the forum environment. Join the conversation today and become an active member of the Rogue Clock community!

User Groups & Resources

Connect with fellow Rogue Clock enthusiasts through specialized user groups, fostering collaboration and knowledge sharing regarding the manual PDF. Access exclusive resources, including advanced tutorials and configuration examples, tailored to specific user needs.

Benefit from peer-to-peer support and learn from the collective experience of a dedicated community. Explore curated resource libraries containing helpful articles, FAQs, and troubleshooting guides. Participate in webinars and online workshops led by Rogue Clock experts.

Expand your understanding and maximize the potential of your Rogue Clock with these valuable user groups and resources!

Alternative Clock Systems

Explore competing clock systems and assess their integration capabilities with your existing infrastructure. Consider features and functionalities offered by alternatives to the Rogue Clock manual PDF.

Comparing Rogue Clock to Competitors

Evaluating alternative clock systems reveals key distinctions. While some prioritize simplicity, the Rogue Clock manual PDF emphasizes robust features and customization. Competitors may lack the advanced network configuration and detailed user profile management found within the Rogue Clock ecosystem.

Consider integration challenges; the Rogue Clock is designed for seamless compatibility. Other systems might require extensive modifications, increasing implementation costs and complexity. The Rogue Clock’s comprehensive documentation, accessible via the manual PDF, provides a distinct advantage.

Integration with Existing Infrastructure

Seamless integration is paramount. The Rogue Clock manual PDF details compatibility with standard time synchronization protocols, facilitating effortless connection to existing networks. Unlike some systems, minimal disruption is expected during deployment. Detailed network configuration instructions within the manual ensure a smooth transition.

Consider legacy systems; the Rogue Clock offers adaptable solutions. The PDF guide provides troubleshooting steps for common integration hurdles. Prioritize a phased rollout, leveraging the manual’s guidance for optimal performance and minimal downtime;

Future Developments & Roadmap

Upcoming software updates will introduce enhanced features and improvements, detailed in future manual revisions. Planned enhancements focus on user experience and expanded functionality, ensuring continued innovation.

Planned Features & Enhancements

Future Rogue Clock iterations will prioritize a more intuitive user interface, simplifying complex configurations. Development focuses on improved network synchronization protocols, ensuring greater accuracy and reliability. Expect expanded alert customization options, allowing tailored notifications based on specific criteria. Integration with third-party platforms is also under consideration, broadening the clock’s functionality. Enhanced security features, including multi-factor authentication, are planned to protect sensitive data. Regular firmware updates will deliver these improvements and address potential vulnerabilities.

Software Update Schedule

Rogue Clock software updates will follow a quarterly release cycle, delivering new features and critical security patches. Minor updates, addressing bug fixes and performance improvements, will be deployed monthly as needed; Major version releases, introducing significant changes, are planned twice annually. Users will receive notifications regarding available updates through the clock’s interface and via email. Detailed release notes will accompany each update, outlining changes and known issues. Automatic update options will be available for convenience, alongside manual installation.

citizen blue angels watch manual pdf

Citizen Blue Angels Watch Manual PDF: A Comprehensive Guide

Discover essential resources for your Citizen Blue Angels timepiece! Access free PDF manuals, setting instructions, and troubleshooting guides for models like AT JY8128-56L and C650.

The Citizen Blue Angels collection represents a prestigious collaboration, honoring the renowned flight demonstration squadron. These timepieces aren’t merely watches; they embody precision, innovation, and a shared commitment to excellence. Crafted with Eco-Drive technology, these watches offer reliable, light-powered operation, eliminating the need for frequent battery changes.

Citizen meticulously designs each model, incorporating features appealing to aviation enthusiasts and watch connoisseurs alike. Finding the correct manual is crucial for understanding your watch’s specific functions. Whether you own the Skyhawk AT JY8128-56L or the C650, readily available PDF manuals unlock the full potential of your Citizen Blue Angels watch, ensuring optimal performance and enjoyment.

Understanding the Eco-Drive Technology

Citizen’s groundbreaking Eco-Drive technology is at the heart of the Blue Angels collection, setting these watches apart. Unlike traditional quartz watches requiring battery replacements, Eco-Drive harnesses light – any light, natural or artificial – to generate power. This sustainable system ensures your watch continuously operates, offering exceptional convenience and reliability.

The manual details how light exposure impacts power reserves, crucial for optimal performance. Understanding this technology is key to maximizing your watch’s lifespan. Eco-Drive watches accumulate a power reserve, allowing them to function in darkness for extended periods. Refer to your specific model’s PDF manual for detailed information on power reserve capacity and charging guidelines.

Locating the Official Citizen Blue Angels Manual PDF

Finding the official Citizen Blue Angels watch manual PDF is straightforward. Citizen’s support website provides downloadable manuals, searchable by watch model number. Begin by identifying your specific model – AT JY8128-56L or C650, for example. Alternatively, numerous online resources archive these manuals for free access. A quick web search using your model number and “manual PDF” will yield relevant results.

Ensure you download from reputable sources to avoid potentially harmful files. The official Citizen website guarantees an authentic and up-to-date manual. These PDF documents contain comprehensive instructions, diagrams, and troubleshooting tips, empowering you to fully utilize your watch’s features.

Model Specific Manuals: AT JY8128-56L

The Citizen Blue Angels Skyhawk AT JY8128-56L boasts a feature-rich design, and its dedicated manual provides detailed guidance. This PDF manual covers everything from initial setup and time/date adjustments to utilizing the alarm, chronograph, and world time functions. It specifically addresses the Skyhawk’s unique capabilities, including radio-controlled accuracy and pilot-focused features.

Users can find clear explanations of each button’s purpose and how to navigate the watch’s various modes. The manual also includes vital information regarding the Eco-Drive technology, power reserve, and proper charging procedures. Downloading the AT JY8128-56L manual ensures optimal performance and longevity of your timepiece.

Model Specific Manuals: C650

The Citizen Blue Angels C650 model, a solar-powered marvel, comes with a comprehensive PDF manual available for free download. This document details the watch’s core functionalities, emphasizing its reliance on light for power. It explains how to maximize the Eco-Drive technology, ensuring consistent and reliable operation without battery replacements.

The C650 manual guides users through setting the time and date, operating the alarm, utilizing the chronograph and timer features, and understanding the power reserve indicator. It’s a crucial resource for unlocking the full potential of this sophisticated timepiece, offering clear instructions for both novice and experienced watch owners.

Key Features and Functions

Explore the diverse capabilities of your Citizen Blue Angels watch, including time/date, alarm, chronograph, and timer modes – detailed in the official manual.

Time and Date Setting

Adjusting the time and date on your Citizen Blue Angels watch requires understanding its Eco-Drive functionality. Typically, you’ll need to pull the crown out to the first click for date adjustment and the second click for time setting. Rotate the crown to change the date, ensuring correct day and month display.

For time adjustment, rotate the crown until the desired time is reached. Pay attention to AM/PM indicators. Some models feature radio-controlled time synchronization, automatically updating the time. Refer to your specific model’s manual (AT JY8128-56L or C650) for precise instructions, as procedures can vary. Always push the crown fully back in after setting to maintain water resistance.

Alarm Function Operation

Setting the alarm on your Citizen Blue Angels watch involves several steps, detailed in your model’s specific PDF manual. Generally, you’ll enter alarm setting mode by pressing specific buttons – consult the AT JY8128-56L or C650 manual for exact button combinations. Once in alarm mode, use the crown or buttons to set the desired alarm hour and minutes.

Activate or deactivate the alarm using designated buttons. Some models offer multiple alarms or a snooze function. Ensure the alarm sound level is appropriate. Remember that the alarm is powered by the Eco-Drive system, so sufficient charge is necessary for operation. Detailed instructions, including alarm reset procedures, are available in the official Citizen documentation.

Chronograph Function Details

Utilizing the chronograph on your Citizen Blue Angels watch allows precise timing of events. The PDF manual for models like the AT JY8128-56L and C650 provides detailed instructions. Typically, a dedicated pusher initiates and stops the chronograph, while another resets it to zero. The main dial displays elapsed seconds, with sub-dials indicating minutes and potentially hours.

Understand the start, stop, and reset button functions as outlined in your specific model’s manual. Some models may offer multiple chronograph modes or lap timing capabilities. The chronograph function draws power from the Eco-Drive system, so ensure adequate charge for accurate operation. Refer to the official Citizen documentation for comprehensive guidance and troubleshooting.

Timer Function Instructions

Accessing the timer function on your Citizen Blue Angels watch, detailed in the official PDF manual (models AT JY8128-56L & C650), enables countdown timing for various activities. Typically, you’ll enter timer mode, then set the desired countdown time using the buttons. The watch will beep when the timer reaches zero.

The manual clarifies how to start, pause, and reset the timer. Some models offer repeat functions or alarm settings linked to the timer. Remember that using the timer consumes power from the Eco-Drive reserve. Consult your specific model’s manual for precise button combinations and feature explanations. Proper understanding ensures optimal timer functionality and accurate timing results.

World Time Function Explained

Citizen Blue Angels watches, as detailed in the downloadable PDF manuals (AT JY8128-56L, C650), often feature a World Time function. This allows you to display the current time in various cities around the globe. The manual guides you through selecting a city from the pre-programmed list, typically using the mode and adjustment buttons.

Understanding how to cycle through cities and switch between 12/24-hour formats is crucial. Some models synchronize with atomic time signals for accuracy. The PDF provides step-by-step instructions for setting and utilizing this feature. Proper use ensures accurate timekeeping across different time zones, making it ideal for travelers or those needing to track international schedules.

Power and Maintenance

Citizen’s PDF manuals detail Eco-Drive power reserve, optimal charging practices, and water resistance ratings for Blue Angels watches, ensuring longevity and performance.

Eco-Drive Power Reserve

Citizen’s innovative Eco-Drive technology harnesses light energy – both natural and artificial – to power your Blue Angels watch, eliminating the need for frequent battery replacements. The manuals, available as PDF downloads, explain the power reserve indicator, showing accumulated energy.

Optimal performance is achieved with a fully charged reserve, enabling all features and functions. The reserve duration varies by model, detailed within each specific manual. Insufficient light exposure will gradually deplete the reserve, potentially impacting functionality. Regularly exposing your watch to light ensures consistent operation. Understanding the power reserve allows proactive maintenance, maximizing your Citizen watch’s lifespan and reliability, as outlined in the official documentation.

Charging Your Citizen Blue Angels Watch

Citizen Blue Angels watches utilize Eco-Drive, converting light into energy. The PDF manuals detail optimal charging practices for your specific model. Direct sunlight isn’t always necessary; indoor lighting can also charge the watch, though it will take longer.

Ensure the watch face is exposed to light. Charging time varies based on light intensity and duration. A fully depleted watch requires significant exposure to regain full functionality. The power reserve indicator, explained in the manual, displays charging progress. Consistent light exposure maintains optimal performance. Avoid prolonged darkness to prevent complete discharge, which may require extended charging. Refer to your model’s manual for detailed charging guidelines and troubleshooting tips.

Water Resistance Information

Citizen Blue Angels watches offer varying degrees of water resistance, detailed in your model’s PDF manual. Water resistance isn’t permanent and can diminish over time due to aging gaskets or impact damage. The manual specifies the watch’s water resistance rating – typically 50m, 100m, or 200m.

50m resists splashes and brief immersion; 100m is suitable for swimming and snorkeling; 200m is appropriate for scuba diving. Avoid operating the crown or pushers underwater unless the watch is specifically designed for it. Regularly inspect gaskets and have them replaced as recommended in the manual. Improper use can compromise water resistance, potentially damaging the movement. Always consult the manual for specific limitations and care instructions.

Battery Replacement (If Applicable)

Citizen Blue Angels watches utilizing Eco-Drive technology generally do not require traditional battery replacements. They are powered by light! However, some older models or those with specific complications might contain a small rechargeable battery. The PDF manual for your specific model will clearly state if battery replacement is necessary and provide detailed instructions.

If a replacement is needed, it’s strongly recommended to have it performed by an authorized Citizen service center. Attempting a DIY replacement can damage the watch’s delicate internal components. The manual will specify the correct battery type. Improper handling or installation can void the warranty and compromise the watch’s functionality. Refer to the manual for authorized service locations.

Troubleshooting Common Issues

Resolve typical problems like timekeeping errors, display malfunctions, or button failures using your Citizen Blue Angels manual PDF for guided solutions!

Watch Not Keeping Time

If your Citizen Blue Angels watch isn’t maintaining accurate time, consult the official PDF manual for specific troubleshooting steps. Ensure sufficient light exposure for Eco-Drive charging, as inadequate power is a common cause. Verify the time and date settings are correct, referencing the manual’s instructions for precise adjustments.

Consider resetting the watch to factory defaults, a procedure detailed within the downloadable manual, to eliminate potential software glitches. Check for radio signal reception issues, particularly for atomic timekeeping models, and follow the manual’s guidance on signal acquisition. If problems persist, the PDF manual provides contact information for Citizen support for further assistance and potential repair options.

Display Issues and Solutions

Experiencing display problems with your Citizen Blue Angels watch? The official PDF manual offers solutions for common issues like dim displays or frozen screens. First, ensure adequate light exposure to recharge the Eco-Drive system, as low power can affect visibility. Consult the manual for instructions on adjusting display brightness settings, if available on your model.

If the display is completely unresponsive, attempt a reset as outlined in the downloadable manual. Check for condensation inside the watch, which can interfere with the display; avoid operating the watch if this occurs. The PDF manual also details troubleshooting steps for specific error messages and provides Citizen’s support contact information for more complex display malfunctions.

Button Malfunctions

Encountering unresponsive or erratic button behavior on your Citizen Blue Angels watch? The official PDF manual provides guidance for addressing these issues. Begin by checking for any physical obstructions or debris around the buttons. A thorough cleaning, as detailed in the manual, might resolve the problem.

If buttons remain unresponsive, the manual suggests attempting a reset of the watch to factory settings. This can often resolve software glitches causing the malfunction. The PDF document illustrates the correct button sequence for resetting. Should the problem persist, consult the manual’s troubleshooting section for specific error codes or contact Citizen’s support team, whose details are included within the downloadable manual.

Resetting Your Watch to Factory Settings

Need to restore your Citizen Blue Angels watch to its original configuration? The official PDF manual details the precise procedure for a factory reset. This process erases all personalized settings, returning the watch to its out-of-the-box state. Before proceeding, note that all alarms and custom configurations will be lost.

The manual clearly illustrates the specific button combination and sequence required for initiating the reset. It’s crucial to follow these steps exactly as outlined to avoid potential complications. A successful reset can resolve persistent software issues or prepare the watch for resale. Download the PDF for visual aids and detailed instructions, ensuring a smooth and accurate restoration process.

Additional Resources

Explore the Citizen support website for FAQs, downloadable manuals, and further assistance with your Blue Angels watch. Find comprehensive PDF guides online!

Citizen Watch Support Website

Citizen provides a robust online support platform dedicated to assisting owners with their Eco-Drive and Blue Angels watches. The official Citizen website offers a dedicated section for watch manuals, allowing users to quickly locate PDF versions for various models, including the AT JY8128-56L and C650.

Navigating the site is streamlined; you can search by watch model number or browse through categorized lists. Beyond manuals, the support website features frequently asked questions (FAQs) addressing common issues, troubleshooting tips, and detailed explanations of watch functions.

Citizen also provides contact information for direct support, including phone numbers and email addresses, ensuring users can receive personalized assistance when needed. This comprehensive resource aims to empower owners with the knowledge to maximize their Citizen watch experience.

Frequently Asked Questions (FAQ)

Q: Where can I find the manual for my Citizen Blue Angels watch? A: The official Citizen website offers downloadable PDF manuals. Search by model number (e.g., AT JY8128-56L, C650) to locate the correct document.

Q: Is the manual available for free? A: Yes, all Citizen watch manuals, including those for the Blue Angels collection, are available for free download as PDF files.

Q: What if I can’t find my specific model? A: Contact Citizen’s customer support directly through their website. They can assist in locating the appropriate manual or provide guidance.

Q: Does the manual cover all watch functions? A: Yes, the manual details all features, including time/date setting, alarm, chronograph, and timer operations.

Where to Download Additional Manuals

Citizen’s official website remains the primary source for Citizen Blue Angels watch manuals in PDF format. Navigate to the ‘Support’ or ‘Manuals’ section and utilize the search function, entering your specific model number – like AT JY8128-56L or C650 – for precise results.

Third-party websites may archive older manuals, but verify their authenticity before downloading. Always prioritize the official Citizen source to ensure accuracy and completeness. Look for links directly from Citizen’s support pages.

Jeweler websites sometimes host manuals as a service to customers. However, confirm the manual corresponds to your exact model for correct instructions.

lippert manual slide out

The Lippert Manual Slide Out system enhances RV functionality by providing additional space. It features a motor, hydraulic cylinder, and rack-and-pinion guide for smooth operation. Troubleshooting common issues like stuck slides or worn gears ensures optimal performance, making it a reliable choice for RV enthusiasts seeking convenience and durability.

1.1 Overview of the Lippert Slide Out System

The Lippert Slide Out System is a mechanism designed to expand living spaces in RVs by sliding out walls or rooms. It combines a motor, hydraulic cylinder, and rack-and-pinion guide system for smooth operation. The system is known for its durability and reliability, offering a space-saving solution for RV enthusiasts. It operates manually or via an electric actuator, depending on the model. The slide-out mechanism is powered by a motor that drives the hydraulic cylinder, ensuring consistent movement. The rack-and-pinion system guides the room assembly, preventing misalignment. Regular maintenance, such as lubrication and fluid checks, is essential for optimal performance. Troubleshooting common issues like misalignment or fluid levels ensures the system remains functional and efficient over time.

1.2 Importance of Manual Slide Outs in RVs

Manual slide outs are essential for RVs as they provide additional living space, enhancing comfort and functionality. They allow users to expand their interior space effortlessly, making RVs more versatile for camping and travel. The manual operation ensures reliability, with fewer mechanical components compared to automatic systems. This simplicity reduces maintenance needs and potential breakdowns. Additionally, manual slide outs are cost-effective, offering a practical solution for RV owners who prefer a straightforward, durable system. They are particularly beneficial for smaller RVs or those with limited power resources, providing an efficient way to maximize space without compromising performance or budget.

1.3 Brief History of Lippert Components

Lippert Components, a leading manufacturer of RV parts, was founded in 1956 by Larry Lippert. Initially focused on producing trailer chassis, the company expanded into RV components, including slide-out systems. Known for innovation, Lippert introduced the manual slide-out system, enhancing RV functionality. Over the years, they developed advanced systems like the rack-and-pinion guide and electric ball screw actuator. Their commitment to quality and durability has made them a trusted name in the RV industry, providing reliable solutions for space optimization and user convenience.

Key Components of the Lippert Manual Slide Out

The system includes a motor, hydraulic slide-out cylinder, rack-and-pinion guide, and electric ball screw actuator. These components work together to ensure smooth and reliable slide-out operation.

2.1 Motor and Gear Assembly

The motor and gear assembly is a critical component of the Lippert Manual Slide Out system, responsible for driving the slide-out mechanism. The motor provides the necessary torque to extend or retract the room, while the gear assembly ensures smooth and precise movement. Constructed from durable materials like steel, the gears are designed to withstand heavy use. Regular lubrication is essential to prevent wear and tear. If the motor or gears fail, the slide-out may malfunction, requiring professional repair. Proper maintenance, such as inspecting for worn teeth or misalignment, ensures optimal performance and extends the system’s lifespan. Neglecting this can lead to costly repairs down the line.

2.2 Hydraulic Slide-Out Cylinder

The hydraulic slide-out cylinder is a vital part of the Lippert Manual Slide Out system, enabling smooth extension and retraction of the RV room. Constructed from high-strength steel, the cylinder withstands heavy loads and harsh environments. Hydraulic fluid powers the cylinder, ensuring consistent and controlled movement. Regular maintenance, such as fluid checks and seal inspections, is crucial to prevent leaks and ensure optimal performance. Over time, wear on the cylinder’s seals or piston can lead to reduced efficiency. Proper care, including lubrication and timely repairs, extends the cylinder’s lifespan. The hydraulic system’s reliability makes it a key component in the overall functionality of the slide-out mechanism, ensuring years of trouble-free operation for RV owners.

2.3 Rack and Pinion Guide System

The rack and pinion guide system is a critical component of the Lippert Manual Slide Out, ensuring precise alignment and smooth movement during extension and retraction. This mechanism consists of a toothed rack and a corresponding pinion gear, which work together to guide the slide-out room securely. The system is designed to minimize wobble and ensure stability, providing a reliable operation. Constructed from high-strength materials, the rack and pinion are durable and resistant to wear. Regular lubrication of the gears is essential to maintain efficiency and prevent corrosion. While the system is robust, improper alignment or debris can cause issues, requiring careful maintenance to ensure optimal performance and longevity.

2.4 Electric Ball Screw Actuator

The electric ball screw actuator is a key component of the Lippert Manual Slide Out system, designed to provide precise and smooth operation. It converts electrical energy into linear motion, enabling the slide-out room to extend and retract efficiently. This actuator is known for its high torque output and quiet operation, making it ideal for RV applications. The ball screw mechanism ensures minimal backlash and consistent performance over time. While it is a reliable component, proper installation and regular maintenance are essential to prevent wear and ensure optimal functionality. The electric ball screw actuator plays a vital role in enhancing the overall performance and durability of the Lippert slide-out system.

Troubleshooting the Lippert Manual Slide Out

Troubleshooting the Lippert Manual Slide Out involves identifying common issues like stuck slides or motor malfunctions. Inspect the motor, gears, and hydraulic cylinders for wear or damage. Perform retract and extend tests on the hydraulic system to ensure proper function. Regular maintenance and lubrication can prevent many problems. If one side won’t extend fully, check the gear assembly and alignment. Addressing these issues promptly ensures smooth operation and extends the system’s lifespan, keeping your RV functional and comfortable.

3.1 Common Issues with the Slide Out System

Common issues with the Lippert Manual Slide Out System include stuck slides, motor malfunctions, and hydraulic cylinder problems. Stuck slides often result from debris or misalignment, while motor issues may stem from electrical faults or worn gears. Hydraulic cylinder problems can arise from fluid leaks or damaged seals. Additionally, improper lubrication of moving parts can lead to premature wear on the rack-and-pinion guide system. Addressing these issues promptly is crucial to maintain the system’s efficiency and longevity. Regular maintenance, such as lubrication and inspection, can help prevent many of these problems. Troubleshooting these common issues ensures smooth operation and extends the system’s lifespan.

3.2 When One Side of the Slide Out Won’t Extend Fully

If one side of the Lippert Manual Slide Out fails to extend fully, inspect the motor and gear assembly on the non-moving side. Worn gears or misalignment may cause this issue. Ensure the rack-and-pinion guide system is properly lubricated and free from debris. Check for hydraulic fluid leaks or low fluid levels, as this can impair cylinder function. Misaligned tracks or bent components may also restrict movement. Apply lubrication to moving parts and verify that the system is evenly balanced. If the problem persists, consult a professional to avoid further damage. Regular maintenance can prevent such issues and ensure smooth operation of the slide-out system.

3.3 Troubleshooting the Motor and Gear Assembly

Troubleshooting the motor and gear assembly of the Lippert Manual Slide Out involves inspecting for wear and tear. Check for worn or stripped gears, as these can prevent smooth operation. Ensure the motor is properly aligned with the gear assembly to avoid misalignment issues. Verify that the motor is receiving adequate power and that all electrical connections are secure. Lubricate moving parts to reduce friction and prevent overheating. If the motor stalls or makes unusual noises, it may indicate a faulty component. Test the motor under load to identify any performance discrepancies. Addressing these issues promptly can prevent further damage and ensure reliable operation of the slide-out system.

3.4 Hydraulic Slide-Out Cylinder Retract Test

Performing a hydraulic slide-out cylinder retract test ensures proper functionality. Start by ensuring the system is on a level surface and the RV is stationary. Activate the retract function and observe the cylinder’s movement. Check for smooth retraction and ensure it fully returns to its original position. Monitor for any leaks or unusual noises during the process. If the cylinder hesitates or stalls, inspect the hydraulic fluid level and connections. Ensure the hydraulic system is properly pressurized and free from air pockets. A successful retract test confirms the cylinder’s reliability and readiness for operation. Regular testing helps maintain optimal performance and prevents potential issues during use.

3.5 Hydraulic Slide-Out Cylinder Extend Test

The hydraulic slide-out cylinder extend test verifies the system’s ability to fully extend the room. Begin by ensuring the RV is on a level surface and the system is activated. Observe the cylinder’s movement, checking for smooth extension and full deployment. Inspect for any hydraulic fluid leaks or unusual noises during operation. Ensure the cylinder reaches its maximum extension point without hesitation. Monitor the hydraulic system’s pressure and fluid levels to confirm proper functionality. Regular extend tests help identify potential issues early, ensuring reliable performance. A successful test confirms the cylinder’s ability to extend fully, providing confidence in the system’s operation and durability over time.

Maintenance and Care for the Lippert Manual Slide Out

Regular maintenance checks, lubrication of moving parts, and fluid filling procedures are essential. Winterizing the hydraulic system protects it from damage during cold weather, ensuring optimal performance and longevity.

4.1 Regular Maintenance Checks

Regular maintenance checks are crucial for ensuring the Lippert Manual Slide Out operates smoothly. Inspect the hydraulic slide-out cylinder for leaks or damage. Check the motor and gear assembly for proper alignment and wear. Lubricate all moving parts, including the rack-and-pinion guide system, to prevent friction and corrosion. Verify fluid levels in the hydraulic system and top them off as needed. Ensure electrical connections are secure and free from corrosion. Perform these checks every 3 to 6 months or before extended use. Addressing issues early prevents costly repairs and ensures reliable performance. Always consult the owner’s manual for specific maintenance recommendations tailored to your system.

4.2 Lubrication of Moving Parts

Lubrication is essential for maintaining the smooth operation of the Lippert Manual Slide Out. Apply a high-quality silicone-based lubricant to all moving parts, including gears, hinges, and the rack-and-pinion guide system. This prevents wear and tear, reduces friction, and protects against corrosion. Focus on areas where metal components come into contact, such as the motor and gear assembly. Lubricate every 1 to 3 months, depending on usage. Avoid using petroleum-based products, as they can attract dirt and degrade rubber seals. Proper lubrication ensures the system operates quietly and efficiently, extending its lifespan. Always refer to the manufacturer’s recommendations for the best lubricants to use on your specific Lippert Manual Slide Out model.

4.3 Fluid Filling Procedure

Proper fluid levels are crucial for the hydraulic system of the Lippert Manual Slide Out. Begin by locating the fluid reservoir, typically near the hydraulic cylinder. Use a clean dipstick to check the fluid level, ensuring it reaches the recommended mark. If low, add the specified hydraulic fluid, usually a high-quality, non-foaming type. Avoid overfilling, as this can cause system pressure issues. After filling, operate the slide out a few times to distribute the fluid evenly. Regular fluid checks prevent reduced efficiency and potential damage. Always refer to the owner’s manual for the correct fluid type and filling procedure to maintain optimal performance and longevity of the system.

4.4 Winterizing the Hydraulic System

Winterizing the Lippert Manual Slide Out’s hydraulic system is essential to prevent damage from freezing temperatures. Start by draining the hydraulic fluid and flushing the system with a recommended winterizing fluid to remove moisture and debris. Refill the system with a high-quality hydraulic fluid rated for low temperatures. Cycle the slide out several times to ensure the fluid circulates properly. Inspect all hydraulic lines and connections for leaks or damage, and seal any gaps to prevent cold air infiltration. Store the RV in a climate-controlled environment or use a high-quality cover to protect the system. Proper winterization ensures smooth operation when you resume use in warmer months.

Upgrading and Customizing the Lippert Manual Slide Out

Upgrading to an electric slide-out system enhances performance and convenience. Customizing the slide-out for specific RV models ensures compatibility and improved functionality. Consult professionals for complex modifications.

5.1 Installation of Aftermarket Parts

Installing aftermarket parts on the Lippert Manual Slide Out can enhance performance and durability. Ensure compatibility with the existing system by consulting the manufacturer’s specifications. Follow detailed installation guides to avoid damaging the motor or gear assembly. Upgrading components like the hydraulic cylinder or electric ball screw actuator requires precision. Always test the system post-installation to ensure smooth operation. For complex modifications, consider seeking professional assistance to maintain warranty validity and system integrity. Proper installation ensures optimal functionality and extends the lifespan of the slide-out mechanism, providing reliable service for years to come.

5.2 Upgrading to an Electric Slide Out System

Upgrading to an electric slide out system enhances convenience and efficiency. The Lippert Electric Slide Out System uses a rack-and-pinion guide and an electric ball screw actuator for smooth, precise movement. This upgrade eliminates manual effort, making operation faster and easier. Ensure compatibility with your RV model and consult the installation manual for specific instructions. Professional installation is recommended to avoid system damage. The electric system offers improved reliability and quieter operation compared to manual setups. Regular maintenance, such as lubrication and gear inspection, is still essential for optimal performance. This upgrade is ideal for RV owners seeking a modern, hassle-free slide out experience.

5.3 Customizing the Slide Out for Specific RV Models

Customizing the Lippert Manual Slide Out for specific RV models ensures optimal performance and compatibility. This process involves precise adjustments to the motor, gears, and control systems to match the RV’s dimensions and weight requirements. Professional technicians often tailor the slide out’s stroke length, force settings, and alignment to fit the vehicle’s unique specifications. Customization may also include upgrading components like the rack-and-pinion guide or hydraulic cylinders for enhanced durability. While customization offers improved functionality, it requires detailed technical knowledge and tools. RV owners are advised to consult authorized dealers or experienced installers to ensure a seamless and safe modification process.

Safety Guidelines for Operating the Lippert Manual Slide Out

Always perform pre-operation checks, ensure the area is clear, and follow manufacturer instructions. Avoid overloading the slide out and keep children away during operation. Regular maintenance is crucial for safe functionality.

6.1 Pre-Operation Safety Checks

Before operating the Lippert Manual Slide Out, ensure the area is clear of obstacles and personnel. Check hydraulic fluid levels and inspect for leaks. Verify that all electrical connections are secure and functioning properly. Test the motor and gear assembly by extending and retracting the slide out slowly. Inspect the rack-and-pinion guide system for wear or damage. Ensure the RV is on a level surface to prevent uneven operation. Perform a trial extension to confirm smooth movement and proper alignment. Address any issues before full operation to ensure safety and prevent potential malfunctions.

6.2 Safe Operation Practices

Always ensure the RV is on a stable, level surface before operating the Lippert Manual Slide Out. Monitor the slide-out’s movement to avoid collisions with nearby objects or people. Never overload the slide-out beyond its recommended weight capacity. Keep children and pets at a safe distance during operation. Avoid sudden or forceful movements, as this can damage the system. Regularly inspect and maintain the hydraulic and electrical components to ensure smooth operation. Never attempt to manually force the slide-out if it malfunctions. Always follow the manufacturer’s guidelines for operation and maintenance to ensure safety and longevity of the system.

6.3 Emergency Procedures for Malfunction

In case of a malfunction, immediately turn off the Lippert Manual Slide Out system to prevent further damage. Engage the emergency brake and ensure the RV is stable. Assess the situation to identify the cause, such as obstructions or hydraulic fluid leaks. Do not attempt to force the slide-out back into position. If the slide-out is stuck, carefully inspect the area for blockages and remove them if possible. If the issue persists, contact a certified technician to avoid causing further damage. Keep the area clear of people and pets until the system is repaired. Always prioritize safety and follow the manufacturer’s emergency guidelines to prevent accidents or injuries.

User Reviews and Feedback on the Lippert Manual Slide Out

Users praise the Lippert Manual Slide Out for its reliability and space-saving design. Many highlight smooth operation and durability. However, some report issues with long-term maintenance and customer support.

7.1 Positive Aspects of the System

The Lippert Manual Slide Out system is widely praised for its reliability and durability. Users appreciate its smooth operation and space-saving design, which enhances RV functionality. The system’s sturdy construction and compatibility with various RV models make it a popular choice. Many owners highlight its ease of use and minimal maintenance requirements. The motor and gear assembly are commended for their efficiency, while the hydraulic slide-out cylinder ensures consistent performance. Overall, the system’s ability to provide additional living space without compromising on quality has made it a favorite among RV enthusiasts seeking convenience and comfort on the go.

7.2 Common Complaints and Concerns

Some users have reported issues with the Lippert Manual Slide Out system, including stuck slides and worn gears. Hydraulic leaks and noisy operation are also common concerns. Additionally, the manual operation can be labor-intensive, especially for larger RVs. Cold weather performance has been criticized, as the system may malfunction in freezing temperatures. While the system is generally reliable, these issues highlight areas for improvement. Addressing these concerns through regular maintenance and timely repairs can help ensure optimal performance and extend the system’s lifespan. Despite these challenges, many users find the benefits of the Lippert Manual Slide Out to outweigh the drawbacks.

7.3 Real-World Performance and Reliability

The Lippert Manual Slide Out system has shown consistent performance in real-world applications, offering smooth and reliable operation for RV owners. Its robust design, including the rack-and-pinion guide system and electric ball screw actuator, ensures durability and stability. Users have reported minimal issues when properly maintained, with the hydraulic slide-out cylinder and motor functioning efficiently. However, occasional malfunctions, such as stuck slides or noisy operation, have been noted. Regular maintenance, including lubrication and fluid checks, is crucial to uphold reliability. Overall, the system delivers dependable service, making it a popular choice for RV enthusiasts seeking functional and long-lasting slide-out solutions.

Frequently Asked Questions (FAQs)

This section addresses common inquiries about the Lippert Manual Slide Out, covering operation, troubleshooting, and maintenance, providing clarity for users seeking practical solutions and insights.

8.1 How Does the Lippert Manual Slide Out Work?

The Lippert Manual Slide Out operates using a motor and gear assembly to drive the slide-out mechanism. The system incorporates a hydraulic slide-out cylinder to extend or retract the room, while the rack-and-pinion guide system ensures smooth alignment and stability. The electric ball screw actuator powers the movement, providing precise control. This design allows for efficient space-saving functionality in RVs, enhancing comfort and convenience. Regular maintenance, such as lubrication and fluid checks, is essential for optimal performance. Understanding these components and their roles helps users troubleshoot and maintain the system effectively, ensuring reliable operation over time.

8.2 Can I Install the Lippert Slide Out Myself?

Installing a Lippert Slide Out is complex and typically requires professional expertise. While experienced DIYers with mechanical skills may attempt it, improper installation can lead to system malfunctions or safety risks. The process involves aligning the motor, hydraulic cylinder, and rack-and-pinion system precisely, which demands specialized tools and knowledge. It is highly recommended to hire a certified technician to ensure proper installation and functionality. Improper installation can void warranties or cause operational issues, making professional assistance the safest and most reliable option for RV owners.

8.3 What Are the Most Common Repairs Needed?

The most common repairs for the Lippert Manual Slide Out involve addressing issues with the hydraulic slide-out cylinder, motor, and gear assembly. Leaks in the hydraulic system, worn gears, and misaligned rack-and-pinion guides are frequent problems. Additionally, electrical faults in the actuator or control panel can require attention. Regular maintenance, such as lubricating moving parts and checking fluid levels, helps prevent these issues. If problems arise, it is often necessary to replace damaged components or adjust the system alignment. Proper troubleshooting and timely repairs are essential to ensure smooth operation and extend the lifespan of the slide-out system.

8.4 How Do I Troubleshoot a Stuck Slide Out?

Troubleshooting a stuck Lippert Manual Slide Out begins with checking for obstructions and ensuring proper alignment. Inspect the hydraulic cylinder for leaks or low fluid levels, as this can cause malfunction. Next, examine the motor and gear assembly for wear or damage. If the rack-and-pinion guide system is misaligned, adjust it carefully. Lubricate all moving parts to ensure smooth operation. If the issue persists, test the hydraulic system by retracting and extending the slide-out slowly. Finally, consult the troubleshooting guide or contact a professional if the problem remains unresolved. Regular maintenance can help prevent such issues and ensure reliable performance.

Conclusion

The Lippert Manual Slide Out is a reliable and durable solution for RV space optimization. Its robust design and smooth operation enhance the overall RV experience, ensuring satisfaction for enthusiasts.

9.1 Final Thoughts on the Lippert Manual Slide Out

The Lippert Manual Slide Out is a dependable and efficient system for RVs, offering enhanced space and functionality. Its design ensures smooth operation, making it a top choice for RV enthusiasts. Regular maintenance and troubleshooting can extend its lifespan, providing years of reliable service. Users appreciate its durability and ease of use, though some note the need for careful handling of moving parts. Overall, it remains a preferred option for those seeking to maximize their RV’s living space without compromising on performance or convenience.

9.2 Recommendations for Future Improvements

Future improvements for the Lippert Manual Slide Out could focus on enhancing durability and user convenience. Upgrading the motor and gear assembly to withstand heavier loads and reduce wear would be beneficial. Additionally, incorporating smarter hydraulic systems with improved fluid efficiency could minimize maintenance needs. Introducing an electric option for manual systems would cater to users seeking easier operation. Enhancing the rack-and-pinion guide system for smoother extension and retraction could also improve performance. Finally, developing a more intuitive control interface and adding features like automatic alignment would elevate user experience, making the system more accessible and reliable for RV enthusiasts.

ge dishwasher troubleshooting manual pdf

This comprehensive guide provides solutions for common GE dishwasher issues, ensuring optimal performance and longevity. It covers diagnostic tools, maintenance tips, and safety precautions for hassle-free operation.

Importance of the Troubleshooting Manual

The troubleshooting manual is essential for diagnosing and resolving common issues with your GE dishwasher. It empowers users to address problems like dishes not cleaning properly, water not draining, or poor drying performance. By following the manual’s guidance, you can identify root causes, such as clogged filters or faulty sensors, and implement solutions. It also helps you understand error codes and when to perform routine maintenance. This resource saves time and reduces the need for professional assistance, ensuring your dishwasher operates efficiently and extends its lifespan. Regular use of the manual helps maintain optimal performance and prevents minor issues from becoming major problems.

Overview of Common Issues and Solutions

Common GE dishwasher issues include dishes not cleaning, water not draining, and poor drying. Solutions often involve checking filters, ensuring proper detergent use, and verifying drain pump functionality. Error codes like blinking lights or beeps signal specific problems, which the manual deciphers. Additionally, issues like wet dishes after cycles or poor drying performance can be addressed by adjusting settings or cleaning components. The manual provides step-by-step fixes for these frequent problems, helping users restore functionality quickly. By addressing these issues, you can ensure your dishwasher runs efficiently and effectively, maintaining cleanliness and reducing wear and tear over time.

Essential Sections of the GE Dishwasher Manual

The manual includes safety precautions, operating instructions, and troubleshooting tips, ensuring users can maintain and repair their dishwasher effectively. These sections are designed to enhance functionality and longevity.

Safety Information and Precautions

The manual emphasizes critical safety measures to prevent accidents and ensure safe operation. It advises against improper installation, using abrasive cleaners, and allowing children to access the dishwasher unsupervised. Users are warned not to use hand dish detergent, as it can cause excessive sudsing and leaks. Additionally, the dishwasher should not share its circuit with other appliances to avoid overload. Proper maintenance, such as cleaning filters and checking for blockages, is also highlighted to maintain efficiency and safety. Adhering to these guidelines ensures a secure and effective dishwasher experience.

Operating Instructions for Optimal Performance

For optimal performance, the manual recommends loading dishes correctly, ensuring water flow is unobstructed, and using approved detergents like Finish Quantum. Regularly cleaning the filter and checking for blockages is essential to maintain efficiency. Users should select the appropriate cycle based on load size and soil level, and avoid overloading the dishwasher. Additionally, maintaining the drain pump and ensuring proper installation are highlighted to prevent issues. By following these guidelines, users can extend the lifespan of their dishwasher and ensure consistent cleaning results. Proper operation also enhances energy efficiency and reduces the need for frequent repairs.

Troubleshooting Tips and Guidelines

The manual provides detailed troubleshooting tips to address common issues quickly. Start by checking error codes, which offer insights into specific problems. Cleaning the dishwasher filter regularly is crucial to prevent clogs and ensure proper drainage. If the dishwasher won’t start, verify power supply and door latch functionality. For poor cleaning results, inspect spray arms for blockages and ensure proper detergent usage. Resetting the dishwasher by unplugging it for 30 seconds often resolves minor glitches. Always refer to the manual for model-specific guidance, such as locating the filter or drain pump. Regular maintenance and timely repairs can prevent major breakdowns and extend appliance lifespan.

Common Issues and Their Solutions

Addressing issues like dishes not cleaning, water remaining, or poor drying? This section offers practical solutions, guiding you through filter cleaning, checking spray arms, and ensuring proper detergent use.

Dishes Not Getting Clean

If your dishes remain dirty after a cycle, check the filter for blockages and clean it regularly. Ensure proper detergent dosage and type, as using incorrect detergents can reduce cleaning efficiency. Verify that the spray arms are unobstructed and free of food particles. Additionally, check for adequate water temperature and rinse aid levels, as these play a crucial role in cleaning performance. Loading dishes correctly, avoiding overcrowding, and ensuring the dishwasher is properly balanced can also improve results. Regularly running a cleaning cycle with a dishwasher cleaner can help maintain optimal performance and remove grease buildup.

Dishes Remaining Wet After Cycle

If dishes are still wet after a cycle, check the rinse aid level and ensure it’s sufficient, as low levels can affect drying performance. Verify that the dishwasher is set to the correct drying option, such as “Heat Dry” or “Fan Assist,” to enhance evaporation. Inspect the drain pump for blockages, as improper drainage can leave water on dishes. Clean the dishwasher filter regularly to ensure proper water flow and heating efficiency. Additionally, check that the dishwasher is properly loaded to allow air circulation and that the door is sealing tightly to retain heat during the cycle. If issues persist, run a diagnostic cycle or reset the dishwasher to restore default settings.

Poor Drying Performance

Poor drying performance can be addressed by checking the rinse aid level and ensuring it’s adequate, as insufficient levels reduce drying efficiency. Verify that the dishwasher is using the correct drying settings, such as “Heat Dry” or “Fan Assist,” which enhance water evaporation. Blocked filters or a malfunctioning heating element can also impede drying; clean or replace these components if necessary. Ensure proper ventilation by checking that the dishwasher door aligns and seals correctly. Additionally, running a cleaning cycle with a dishwasher cleaner can remove grease and debris, improving drying performance. Regular maintenance and ensuring the dishwasher is not overloaded can also prevent poor drying issues. Always refer to the manual for specific instructions on troubleshooting and maintaining your GE dishwasher.

Specific Model Troubleshooting

Models like GDF510PSD2SS and GDF640HSMSS may face unique issues. Check filters, drain pumps, and error codes specific to your model for effective troubleshooting.

Troubleshooting for GDF510PSD2SS Model

The GDF510PSD2SS model often experiences issues like dishes not cleaning properly or remaining wet. Check the filter for blockages and ensure the drain pump is functioning. Error codes can indicate specific problems, such as drainage issues or sensor malfunctions. Regularly cleaning the filter and ensuring proper detergent use can prevent many issues. If the dishwasher doesn’t start, verify power supply and door alignment. Refer to the manual for detailed diagnostic steps and solutions tailored to this model. Addressing these common problems can restore optimal performance and extend the appliance’s lifespan.

Common Problems in GDF640HSMSS Model

The GDF640HSMSS model frequently encounters issues such as poor drying performance and error codes indicating sensor or drain pump malfunctions. Dishes may remain wet due to improper detergent use or a clogged filter. Noise during operation could signal faulty components like the motor or bearings. Regular maintenance, including cleaning the filter and checking detergent dosage, can prevent many issues. If the dishwasher fails to start, ensure the power supply is stable and the door is properly aligned. Consulting the manual for specific troubleshooting steps helps resolve these common problems efficiently, ensuring optimal performance and longevity.

Diagnostic and Repair Guidance

This section provides detailed steps to identify and fix issues using error codes, filter cleaning, and drain pump solutions, ensuring effective troubleshooting and repair of your GE dishwasher.

Understanding Error Codes and Lights

GE dishwashers use specific error codes and light sequences to indicate malfunctions. These codes, such as “LC” for leak detection or “HL” for high temp issues, guide users to the root cause. Refer to your manual for a full list of codes. Blinking lights often signal door latch problems or sensor issues. By deciphering these codes, you can address problems like faulty sensors, clogged filters, or pump failures. Regular checks and timely interventions ensure your dishwasher runs smoothly and avoids costly repairs. Always consult the manual for accurate diagnostics and solutions.

How to Check and Clean the Dishwasher Filter

To ensure optimal performance, regularly inspect and clean your GE dishwasher’s filter. Locate it at the bottom of the dishwasher or under the lower rack. Remove any large food particles and rinse the filter under warm water. Use a soft brush to scrub away grease and debris. Avoid harsh chemicals to prevent damage. Replace the filter securely after cleaning. Neglecting this step can lead to poor drainage and inefficient cleaning. Refer to your manual for specific instructions tailored to your model. Regular maintenance helps maintain your dishwasher’s efficiency and longevity.

Drain Pump Issues and Solutions

If your GE dishwasher’s drain pump isn’t functioning properly, it can leave water in the tub after a cycle. Check for blockages in the drain hose or filter, as debris often causes malfunctions. Ensure the pump is clear of food particles and grease buildup. If issues persist, consult your manual for instructions on accessing and testing the pump. In some cases, professional servicing may be required. Regular maintenance, such as cleaning the filter and inspecting hoses, can prevent pump-related problems. Addressing these issues promptly ensures efficient drainage and optimal dishwasher performance, avoiding potential damage or water accumulation.

Advanced Troubleshooting Techniques

This section covers advanced methods to resolve persistent dishwasher issues, including resetting the appliance, testing the door switch, and checking components. Know when professional help is needed.

Resetting the Dishwasher

Resetting your GE dishwasher can resolve issues like error codes or interrupted cycles. To reset, unplug the dishwasher from the power source for 30 seconds. This allows the control board to clear any temporary glitches. After plugging it back in, run a test cycle to ensure proper function. For specific models, refer to the manual for additional reset procedures. Regular resets can prevent recurring problems and maintain optimal performance. Always ensure the dishwasher is properly installed and maintained to avoid unnecessary resets and extend its lifespan. This simple step can often restore functionality without professional intervention.

Testing the Door Switch and Other Components

Testing the door switch is crucial to ensure proper dishwasher operation. A faulty door switch can prevent the dishwasher from starting or functioning correctly. To test it, use a multimeter to check for continuity when the door is closed. If no continuity is found, replace the switch. Additionally, inspect other components like the drain pump, filter, and sensors for blockages or damage. Regular testing helps identify issues early, preventing major repairs. Always refer to the manual for specific instructions on testing and replacing components for your GE dishwasher model. Proper maintenance ensures efficient and reliable performance, reducing downtime and extending appliance lifespan.

When to Call a Professional

If you encounter complex issues beyond basic troubleshooting, it’s essential to contact a certified technician. Problems like persistent error codes, electrical malfunctions, or severe water leaks require professional expertise. DIY repairs can sometimes worsen the issue or void your warranty. GE Appliances recommends reaching out to their customer service at 1-800-GECares for reliable assistance. Always ensure the technician is authorized to handle your specific GE dishwasher model. Their specialized knowledge and tools will resolve the problem efficiently, ensuring safety and optimal performance. Don’t hesitate to seek professional help when needed to avoid further damage and costly repairs.

Downloading and Using the Manual

Access the GE dishwasher manual PDF online by visiting the GE Appliances website. Enter your model number to download the manual, which includes troubleshooting guides, safety tips, and operating instructions for free.

Where to Find the GE Dishwasher Manual PDF

To locate the GE dishwasher manual PDF, visit the official GE Appliances website. Navigate to the “Owners Support” section and select “Appliance Manuals.” Enter your dishwasher’s model number in the search bar to access the corresponding manual. Additionally, registered users can find manuals for their appliances through their GE Appliances account. The manual is available for free and includes detailed troubleshooting guides, safety information, and operating instructions tailored to your specific model. This resource ensures you have all the necessary information to maintain and repair your dishwasher efficiently.

How to Navigate the Manual Effectively

To navigate the GE dishwasher manual PDF efficiently, start by reviewing the table of contents to identify key sections such as Safety Information, Operating Instructions, and Troubleshooting Tips. Use the search function to quickly locate specific topics like error codes or maintenance procedures. Familiarize yourself with the structure, as sections are organized by common issues and solutions. Pay attention to highlighted sections like Diagnostic Guidance and Repair Instructions for addressing malfunctions. By understanding the manual’s layout, you can resolve issues faster and ensure optimal appliance performance. Regularly refer to the manual to maintain your dishwasher effectively.

Additional Resources and Support

GE offers extensive support through customer service at 1-800-GECares and online forums, providing troubleshooting guides, manuals, and expert advice for resolving dishwasher issues efficiently.

GE Appliance Customer Service Contact Information

For assistance with your GE dishwasher, contact customer service at 1-800-GECares (1-800-432-2737). Available Monday–Friday, 8 a.m.–8 p.m. ET, they provide troubleshooting support, repair scheduling, and general inquiries. Visit the official GE Appliances website for additional resources, including manuals and FAQs. Online chat support is also available for convenient help. Ensure to have your model number ready for faster service. This dedicated team is committed to resolving issues promptly, ensuring your appliance operates efficiently.

Online Communities and Forums for Troubleshooting

Online forums and communities are invaluable for GE dishwasher troubleshooting. Platforms like Repair Clinic, GE Appliances Forums, and Reddit offer extensive discussions and solutions from experienced users and professionals. These resources provide real-time advice, DIY repair guides, and shared experiences to diagnose and fix common issues; Many users share step-by-step fixes for error codes, filter cleaning, and drain pump problems. Additionally, official GE support forums ensure accurate troubleshooting guidance. Engaging with these communities can save time and help resolve issues without professional assistance, leveraging collective knowledge for effective appliance maintenance.

By following the GE dishwasher troubleshooting manual, users can effectively resolve issues, ensuring optimal performance and extending appliance longevity through proper maintenance and care.

Final Tips for Maintaining Your Dishwasher

Regular maintenance is key to ensuring your GE dishwasher operates efficiently. Clean the filter after each use to prevent clogs and poor drainage. Check the drain pump periodically for blockages and ensure it’s functioning properly. Use high-quality detergent to avoid suds buildup and maintain water flow. Run a cleaning cycle monthly to remove grease and food residue. Always refer to the troubleshooting manual for specific model guidance. If issues persist, don’t hesitate to contact GE customer support or a certified technician. Proper care will extend the lifespan of your appliance and ensure consistent performance.

Importance of Regular Maintenance

Regular maintenance is essential for ensuring your GE dishwasher operates efficiently and effectively. Cleaning the filter after each use prevents clogs and improves water flow. Checking the drain pump regularly ensures proper drainage and avoids leaks. Using the correct detergent and rinse aid enhances cleaning performance and prevents residue buildup. Running a cleaning cycle monthly removes grease and food particles, maintaining hygiene. Proper maintenance also reduces energy consumption and extends the lifespan of your appliance. Always refer to the troubleshooting manual for model-specific guidance to keep your dishwasher in optimal condition and prevent costly repairs.